
BLOG
21 Tile Calculator Guide for Accurate Measurements
Accurately measuring tiles is essential for any home renovation or DIY project. Using a reliable tile calculator ensures that you buy the right amount of tiles, save money, and avoid wastage. This comprehensive tile calculator guide walks you through different methods to measure your space, calculate tile quantities, and account for grout lines and patterns. Whether you’re tiling a bathroom, kitchen, or living room, these 21 tips will simplify the process, improve your accuracy, and make planning your project stress-free, efficient, and professional-looking.
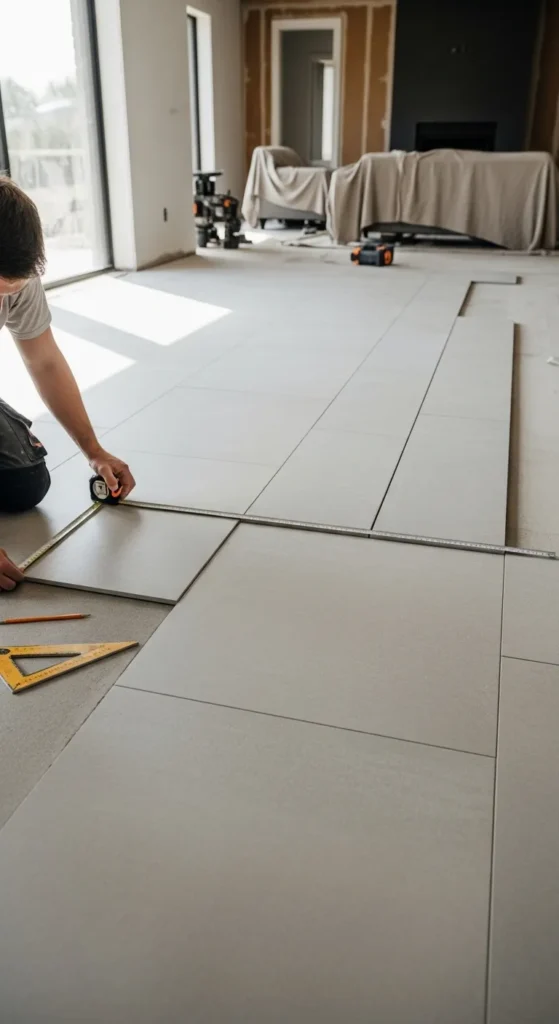
1. Understand Your Room Dimensions

Measuring the length and width of your room is the first step in any tiling project. Accurate measurements form the foundation for calculating the number of tiles required, ensuring minimal wastage. Start by using a reliable measuring tape to note the dimensions in feet or meters. Record each measurement carefully, including any nooks, corners, or irregular areas. This process helps you visualize the layout and plan for tile cuts, patterns, and placement. Keeping detailed notes ensures you can double-check your calculations and avoid errors.
Once you have precise room dimensions, you can input them into a tile calculator to get an accurate estimate. This tool considers factors like tile size, spacing, and grout lines, giving you a clear idea of the number of tiles needed. It also allows you to account for extra tiles in case of breakage or future repairs. Accurate room measurements combined with a tile calculator reduce stress, save money, and streamline your tiling process, giving a professional finish to your space.
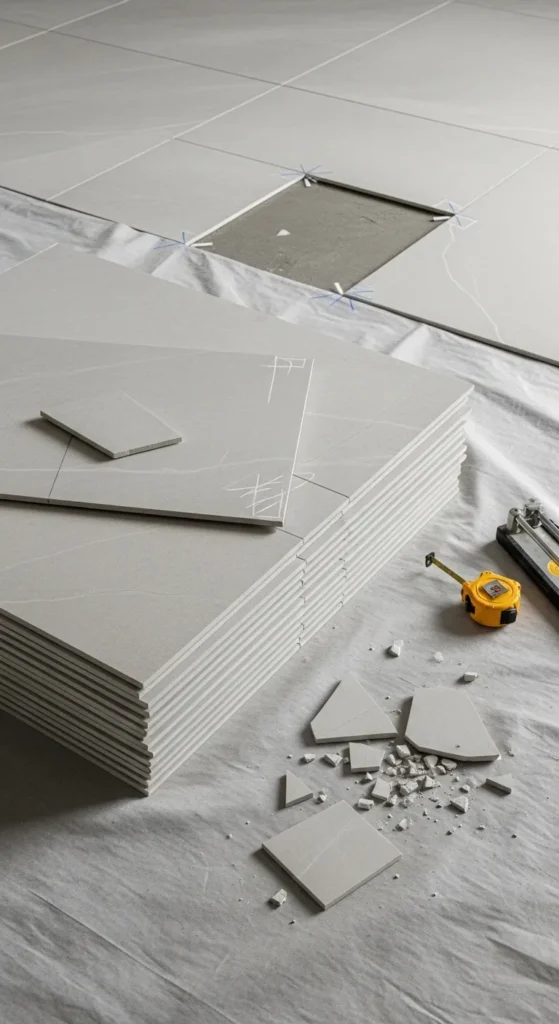
2. Choose Tile Size Carefully
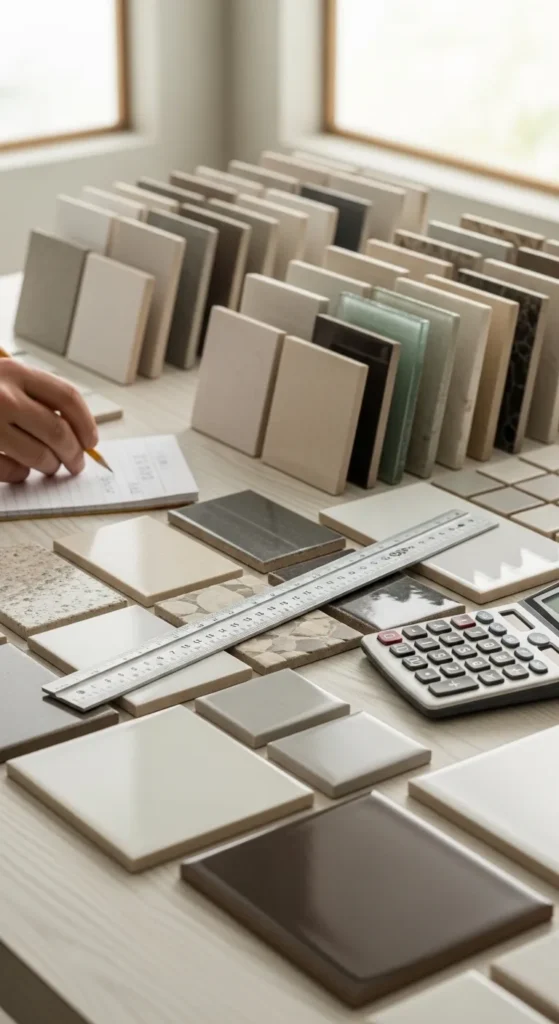
Selecting the right tile size is crucial for achieving a polished look and minimizing waste. Smaller tiles may require more cuts and grout lines, while larger tiles can cover more space but may need careful planning for alignment. Test different tile sizes on paper layouts or using a calculator to see how they fit your room’s dimensions. Consider the overall design aesthetic and functionality; for example, large tiles can make a small room appear more spacious. Measuring the area with your chosen tile size ensures accurate calculations.
A tile calculator can help determine the number of tiles required for your selected size. Input the room dimensions and tile size to calculate coverage, factoring in grout lines. This step helps prevent under or over-purchasing and ensures the tiles fit seamlessly. By planning ahead, you can visualize your finished project, avoid unnecessary cuts, and create a tidy, well-organized tiling layout. Proper tile size selection combined with accurate calculations guarantees a smooth and stress-free installation.
3. Account for Grout Lines
Grout lines not only add to the aesthetic of your tiling project but also affect the total number of tiles required. Measure and plan for the spacing between tiles before ordering materials. Even small differences in grout thickness can change the total coverage area. Using spacers during installation helps maintain uniformity and prevents misalignment. Including grout lines in your tile calculator input ensures a precise count and prevents miscalculations. Proper spacing contributes to a professional and visually balanced finish in any room.
Grout lines also affect tile cuts at edges and corners. Accounting for these in advance ensures that you have enough tiles for the entire project. A tile calculator allows you to input both tile size and grout width, giving an accurate estimate of required materials. This foresight reduces wastage, avoids last-minute trips to the store, and saves both time and money. Attention to grout spacing enhances durability, ensures proper adhesion, and improves the overall appearance of your tiled surface.
4. Consider Tile Pattern Layout
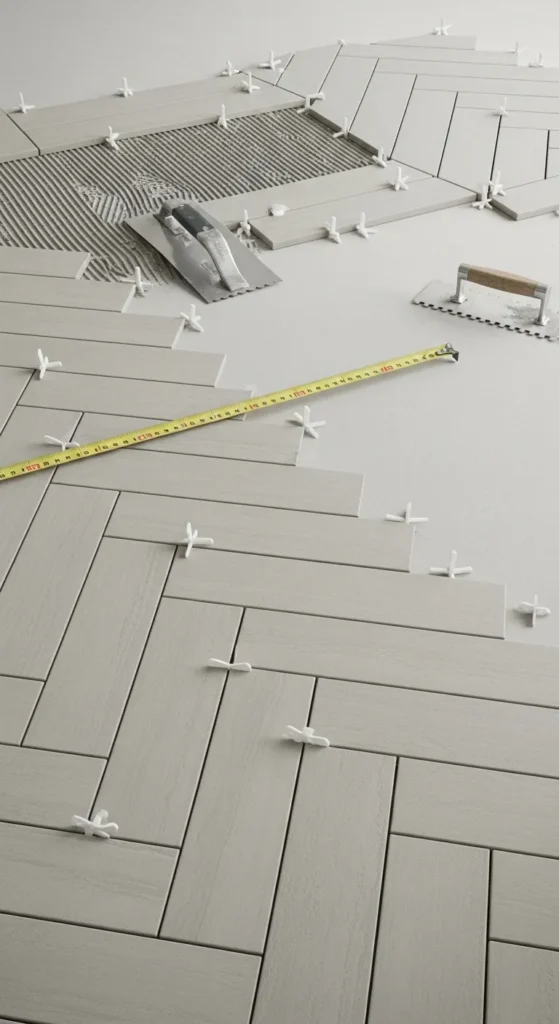
The pattern in which you lay tiles influences the number of tiles required and the complexity of your project. Popular layouts like herringbone, diagonal, or brick patterns may need additional tiles for cuts and alignment. Before purchasing, sketch the pattern or use design software to visualize how tiles will fit within the room dimensions. Proper planning ensures consistency and minimizes errors during installation. A tile calculator can help adjust quantities based on your chosen pattern, saving you from unexpected shortages.
Tile patterns also affect installation time and aesthetics. Some designs require precise measurement for each row to maintain alignment, especially around edges and corners. Using a tile calculator ensures that you order extra tiles to accommodate intricate patterns without overspending. Planning patterns in advance guarantees a professional finish, reduces frustration during installation, and helps maintain a balanced and harmonious look in your space.
5. Include Extra for Cuts and Waste
Even with precise measurements, it’s wise to purchase additional tiles to account for cuts, breakage, and mistakes. Typically, adding 10–15% extra ensures that you have enough material for a seamless installation. Include this factor when using a tile calculator to prevent last-minute shortages. Extra tiles are especially important for irregularly shaped rooms or when using complex patterns that require more cuts. Planning ahead ensures that your project runs smoothly and avoids costly delays.
Extra tiles also allow for future repairs or replacements, maintaining your flooring’s consistency. Storing leftovers properly keeps them safe for potential touch-ups or renovations. By combining careful measurement with a tile calculator and accounting for waste, you can accurately determine the total number of tiles required. This approach minimizes stress, saves money, and guarantees a professional, long-lasting result for your tiling project.
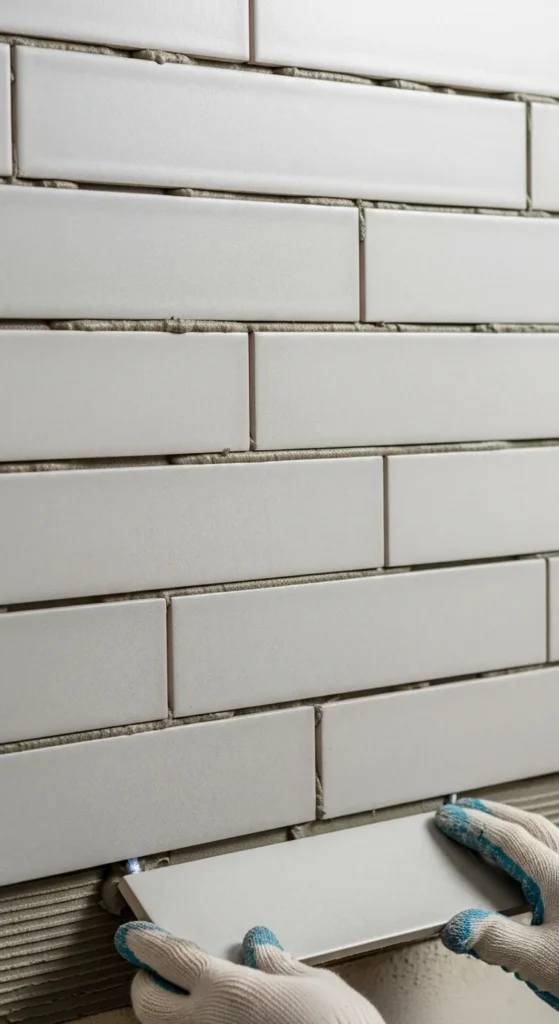
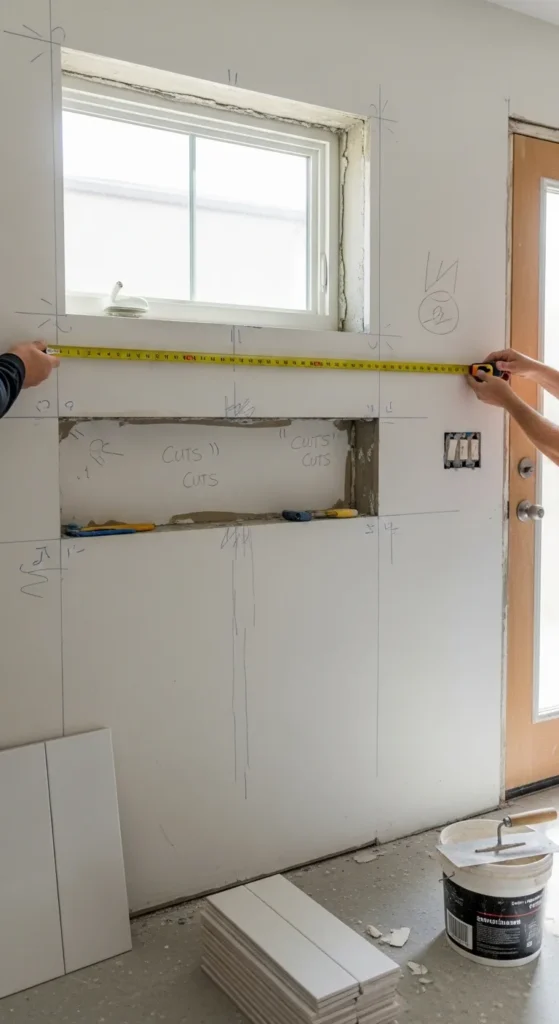
6. Measure Wall Tiles Vertically

Wall tiling requires precise vertical measurements to ensure coverage from floor to ceiling. Use a measuring tape to determine the height and width of each wall, factoring in windows, doors, and fixtures. Accurate vertical measurements prevent shortages and allow for proper alignment of tiles, especially for designs like subway or stacked layouts. Inputting these measurements into a tile calculator ensures you purchase the correct quantity and maintain symmetry throughout the wall.
Vertical measurements are also critical for aligning patterns and grout lines consistently. Planning ahead helps determine where partial tiles will be necessary, reducing mistakes during installation. A tile calculator provides accurate estimates for wall tiles, factoring in both vertical height and tile size. Combining vertical measurements with proper planning ensures a polished, professional finish and a stress-free tiling experience.
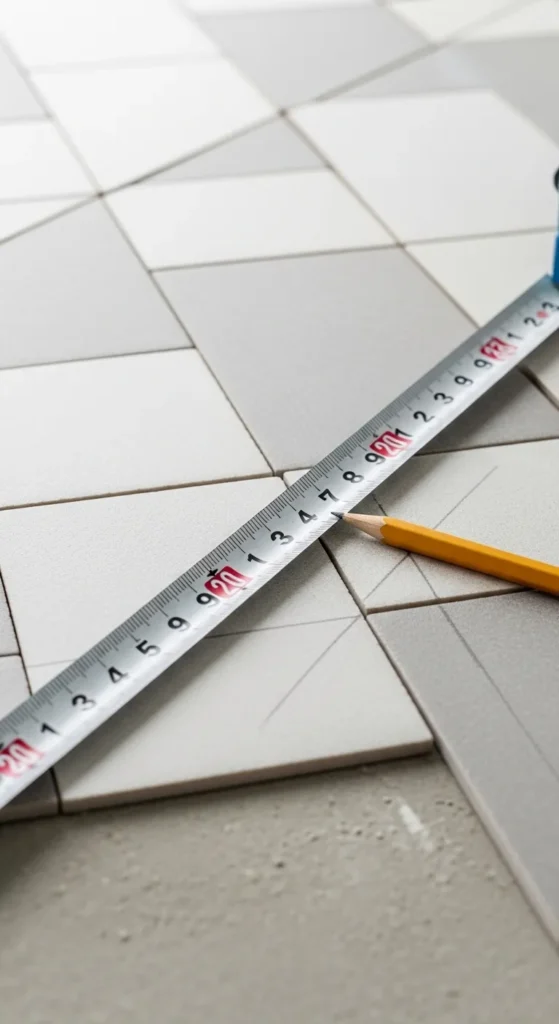
7. Measure Floor Tiles Accurately
Accurate floor measurements are essential for a seamless tile installation. Measure length and width carefully, including alcoves and uneven areas. Record dimensions for each section to ensure complete coverage. Using a tile calculator, you can input these measurements to determine the exact number of tiles required, factoring in pattern, tile size, and grout lines. This ensures that you avoid under-purchasing or over-purchasing materials.
Floor measurements also guide layout decisions, including where to start tiling and how to position tiles for symmetry. By combining precise measurement with a tile calculator, you streamline planning, minimize waste, and reduce installation errors. Accurate measurements improve efficiency, help you visualize the finished project, and ensure a professional-looking floor that enhances the room’s overall appearance.
8. Use a Digital Tile Calculator
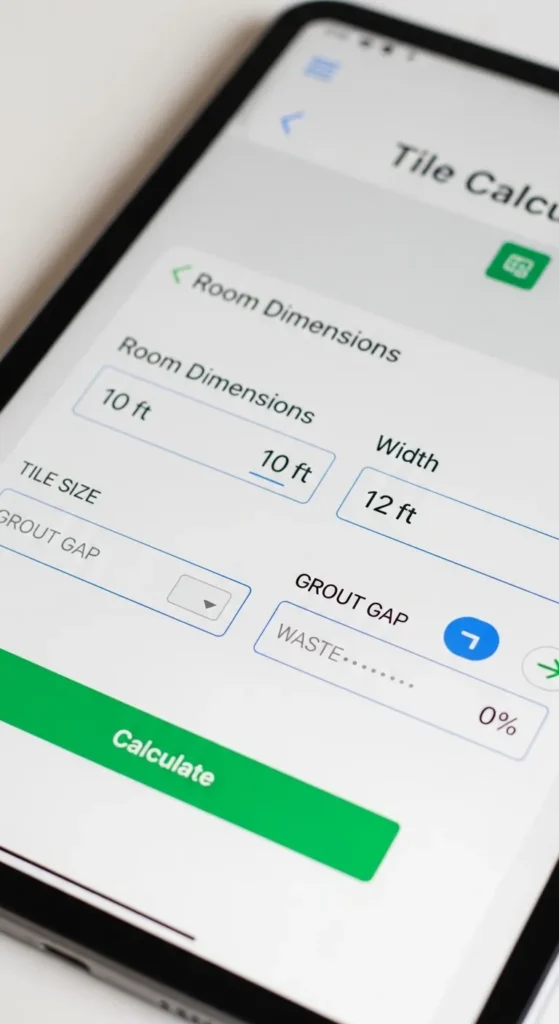
Digital tile calculators simplify the process of estimating tile quantities by allowing quick input of dimensions, tile size, and grout width. These tools save time compared to manual calculations and reduce the risk of errors. Many apps also allow for pattern selection and extra tile calculation for cuts, making them ideal for both DIY enthusiasts and professionals. Using a digital calculator ensures precise planning, helping you purchase the correct amount of materials for any project.
Digital tile calculators are especially useful for complex layouts and multiple rooms. You can save measurements, experiment with different tile sizes, and adjust for various patterns before making purchases. The convenience of an app or online calculator streamlines the planning process, allowing you to confidently tackle any tiling project. This method improves efficiency, reduces stress, and ensures accurate results, making your tiling project smooth and professional.
9. Measure Odd-Shaped Rooms
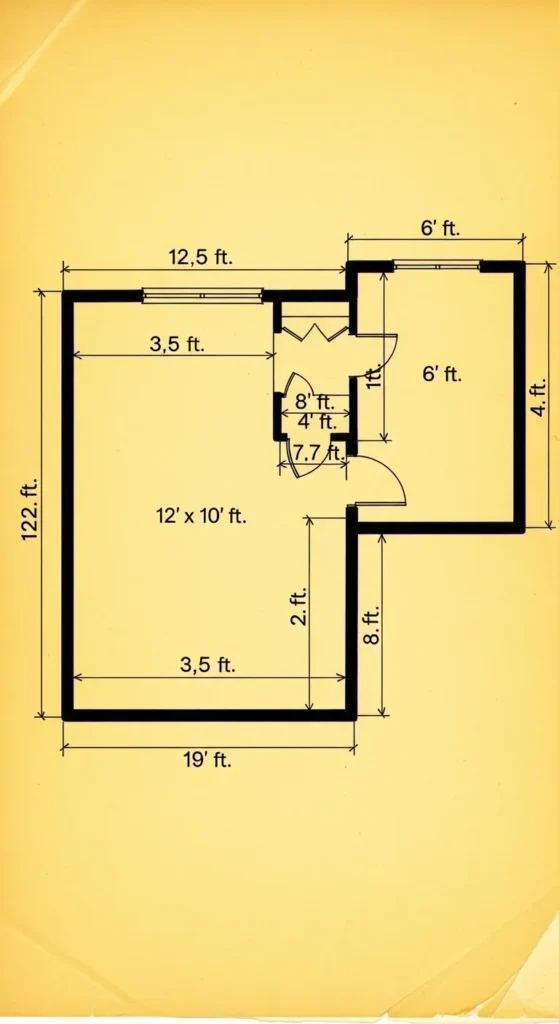
Odd-shaped rooms, such as L-shaped or irregular areas, require careful measurement to avoid mistakes. Break the space into rectangular or square sections, measure each individually, and then combine the results. Input these dimensions into a tile calculator to get an accurate tile count. This approach prevents underestimating materials and ensures that every section is fully covered. Proper measurement of odd-shaped rooms simplifies layout planning and prevents unnecessary tile cuts.
Accounting for irregular spaces also helps you plan for pattern alignment and grout line consistency. Using a tile calculator ensures that each section’s measurements contribute to the total tile count, factoring in extra tiles for cuts and waste. Careful planning for odd-shaped rooms minimizes errors, reduces costs, and guarantees a professional, visually pleasing finish. Accurate measurement is key to a smooth and efficient tiling process.
10. Include Door and Window Openings
When calculating tiles for walls or floors, subtract the area of doors, windows, or built-in fixtures. Ignoring these spaces can lead to over-purchasing and wasted materials. Measure the height and width of each opening and input the remaining area into a tile calculator to get an accurate estimate. Properly accounting for these areas ensures efficiency and cost-effectiveness in your tiling project.
Including openings in your calculations also improves installation planning. You can position tiles symmetrically around doors and windows, ensuring balanced patterns and minimal cuts. A tile calculator provides a precise tile count while factoring in these deductions, reducing errors and ensuring a professional finish. Accurate planning around openings helps your project stay organized and visually appealing.
11. Plan for Diagonal Tile Layouts
Diagonal tile layouts create a unique and visually appealing floor design but require careful planning. Diagonal patterns typically need more tiles because of angled cuts along edges. Using a tile calculator guide helps estimate the extra tiles required, reducing waste and ensuring you have enough material. Proper measurement of the floor, along with precise calculations, ensures the pattern aligns symmetrically across the room.
Planning for diagonal layouts also improves installation efficiency. By knowing the exact number of tiles needed, you can prepare cuts ahead of time, maintain pattern consistency, and achieve a professional finish. The tile calculator guide ensures accurate estimates for both main tiles and extra pieces, making complex patterns easier to manage and reducing unnecessary stress during the tiling process.
12. Calculate Mosaic Tile Quantities
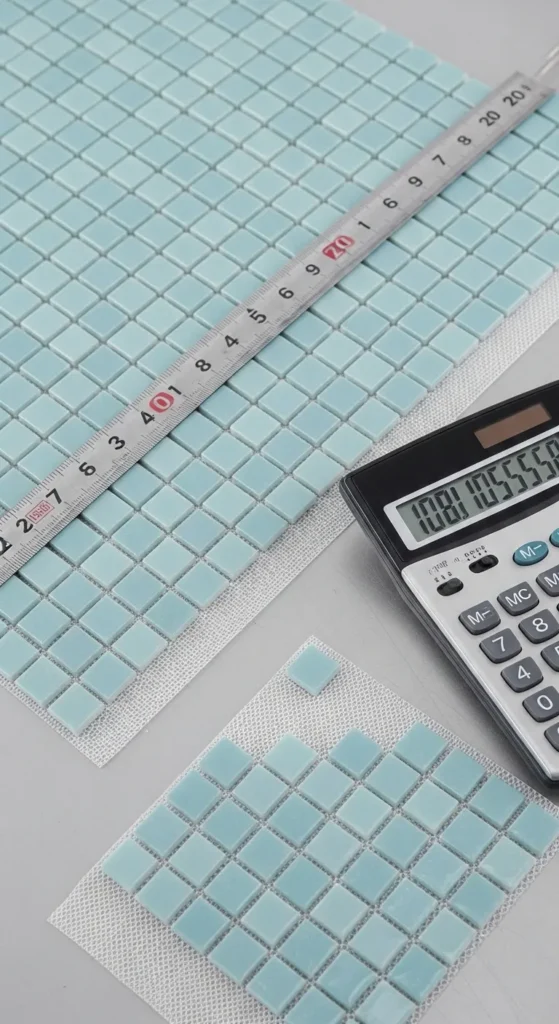
Mosaic tiles are small and often come in sheets, making quantity calculation slightly different from standard tiles. Using a tile calculator guide allows you to input the sheet size and area measurements to determine the exact number of sheets needed. This prevents over-purchasing and ensures uniform coverage. Precise planning helps maintain a consistent look and avoids running short mid-project.
Calculating mosaic tiles also involves considering grout lines between the tiny tiles. A tile calculator ensures you factor in spacing, coverage, and extra sheets for cuts. Proper planning with a calculator helps streamline installation, maintain design accuracy, and provide a polished, professional finish without unnecessary costs or wasted tiles.
13. Consider Tile Thickness
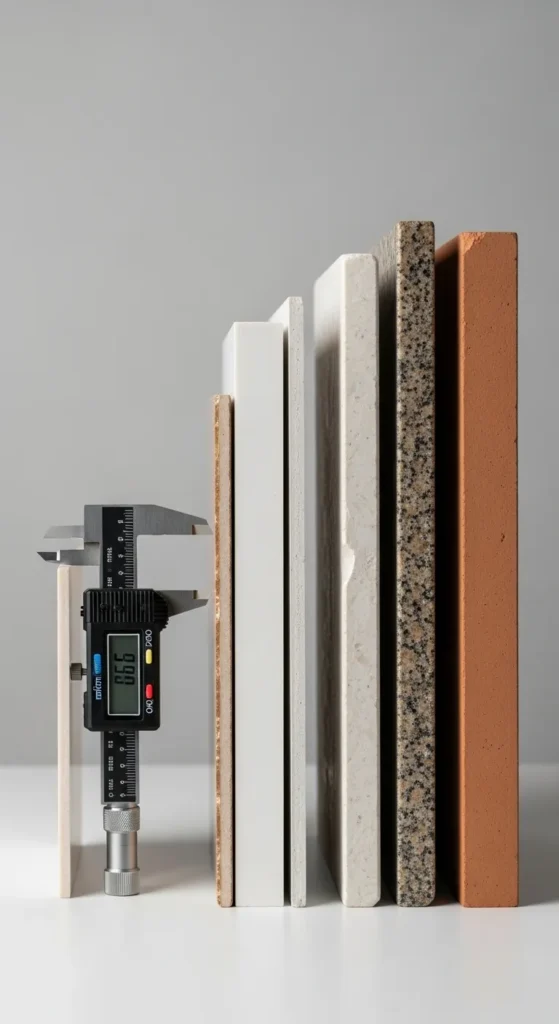
Tile thickness affects installation, especially when transitioning between different surfaces like floors or walls. Accurately measuring thickness ensures a smooth, level finish. Using a tile calculator guide allows you to account for tiles’ dimensions, including thickness, in your overall layout planning. This consideration prevents uneven surfaces and enhances structural integrity.
Accounting for tile thickness also helps when estimating adhesives or leveling compounds. The tile calculator provides insights into required materials for a level installation, reducing installation errors. Properly planning for thickness ensures your project looks professional, aligns perfectly, and avoids costly corrections later.
14. Include Expansion Gaps

Expansion gaps prevent tiles from cracking due to temperature changes or floor movement. When using a tile calculator guide, include these gaps in your measurements to ensure proper spacing along walls and corners. Correctly planned gaps contribute to the longevity and durability of your tiled surfaces.
Including expansion gaps also improves the overall aesthetic by preventing buckling and uneven edges. Calculators help account for these gaps while maintaining accurate tile counts. Planning ahead ensures a stress-free installation and protects your tiles from future damage, providing a professional, lasting finish.
15. Measure Around Fixtures
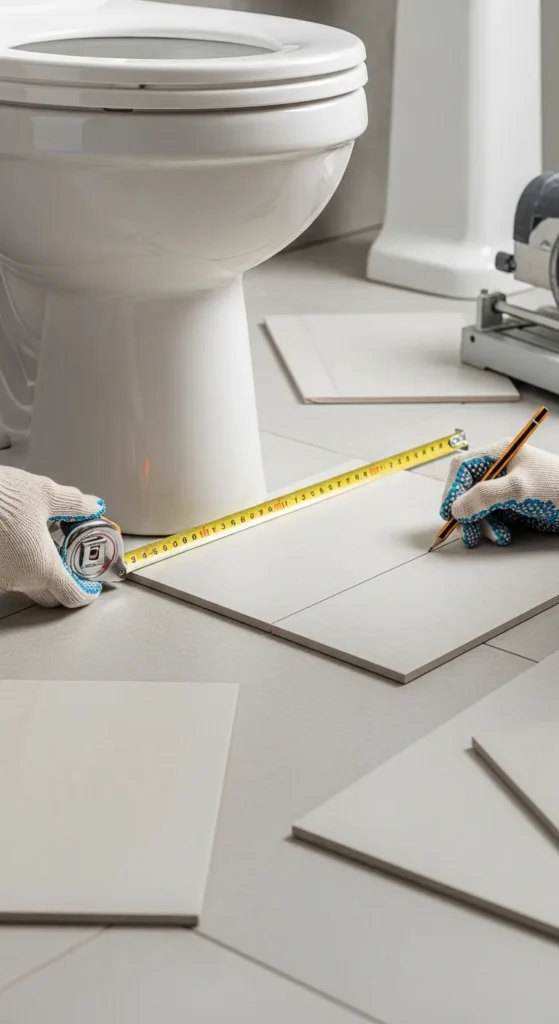
Fixtures like toilets, sinks, and cabinets reduce the available tileable area. Accurately measuring these spaces ensures you do not overestimate your tile requirements. A tile calculator guide helps subtract these areas from total measurements and provides a precise count of tiles needed. Proper planning prevents unnecessary purchases and keeps installation efficient.
Measuring around fixtures also allows you to plan tile cuts with accuracy. By using the calculator, you can ensure symmetry and consistent patterns around obstacles. This reduces mistakes and enhances the visual appeal of your project, giving a seamless, professional finish in tricky areas.
16. Account for Wall Nooks and Recesses
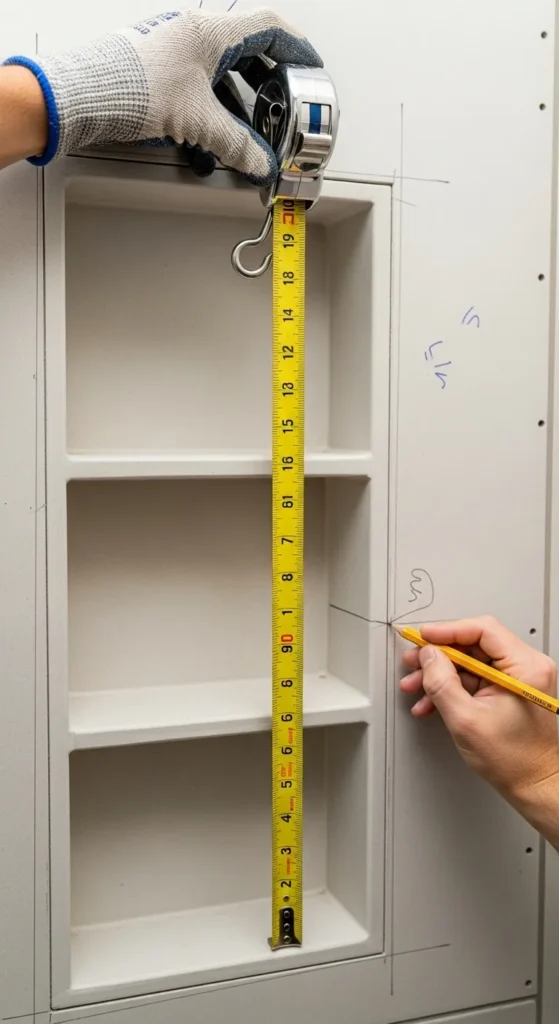
Wall nooks and recessed spaces add complexity to tile measurement. Use a tile calculator guide to calculate these smaller areas separately and combine them with main wall measurements. This ensures you purchase enough tiles to cover the entire wall accurately. Careful planning helps maintain alignment and pattern continuity.
Including nooks in your calculations prevents shortages and ensures tiles fit perfectly within recessed areas. A tile calculator helps determine extra tiles needed for precise cuts. Accounting for these details provides a clean, professional finish and saves time during installation by avoiding last-minute adjustments.
17. Consider Tile Orientation

The orientation of tiles—horizontal, vertical, or staggered—impacts the number of tiles required and the visual effect. Using a tile calculator guide allows you to factor in orientation when estimating quantities. Planning for orientation ensures alignment, consistent patterns, and minimal waste during installation.
Tile orientation also affects cuts at edges and around corners. Including this consideration in calculations ensures symmetry and aesthetic balance. A tile calculator helps adjust for orientation, giving accurate estimates and making installation smoother, with fewer mistakes and better visual results.
18. Include Extra for Breakage
Tiles can break during transport, cutting, or installation. Adding extra tiles is essential to cover these losses. A tile calculator guide helps you calculate a percentage of additional tiles to purchase, typically 10–15% more than the calculated amount. This prevents delays and ensures seamless completion of your project.
Having extra tiles on hand also allows for future repairs. Properly calculating extras with a tile calculator ensures you maintain consistency in color and style, avoiding mismatched replacements. Planning ahead saves money, reduces stress, and guarantees a professional, long-lasting finish.
19. Use Templates for Custom Cuts
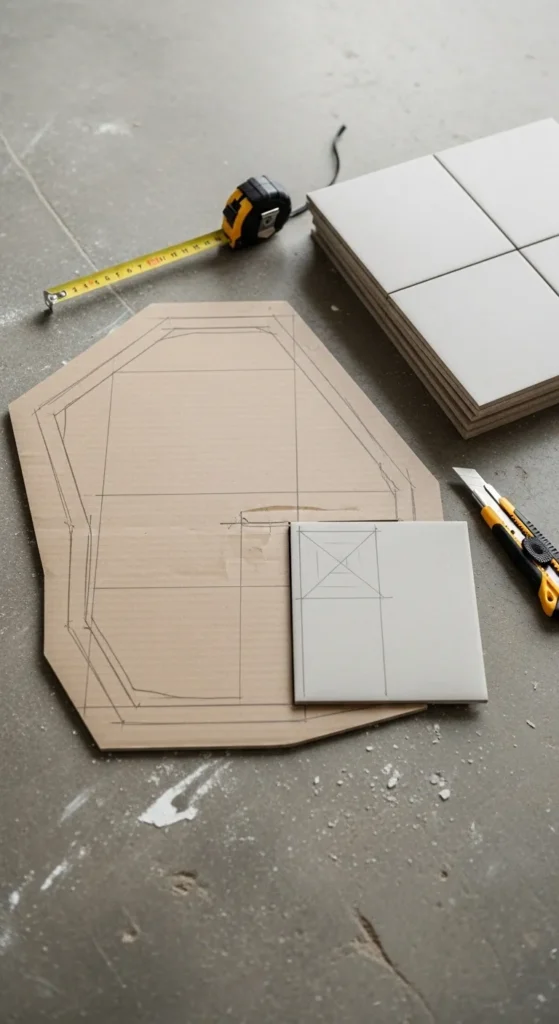
Custom cuts are often required for corners, edges, or irregular spaces. Using templates ensures accuracy when cutting tiles to fit specific areas. Incorporating a tile calculator guide in this process helps estimate extra tiles needed for these custom cuts, reducing waste. Templates improve precision, maintain pattern continuity, and prevent errors during installation.
Templates also speed up installation by providing clear guides for each cut. A tile calculator helps plan these cuts and ensures enough material is available. Using both tools together guarantees a neat, professional finish, saving time and reducing costly mistakes.
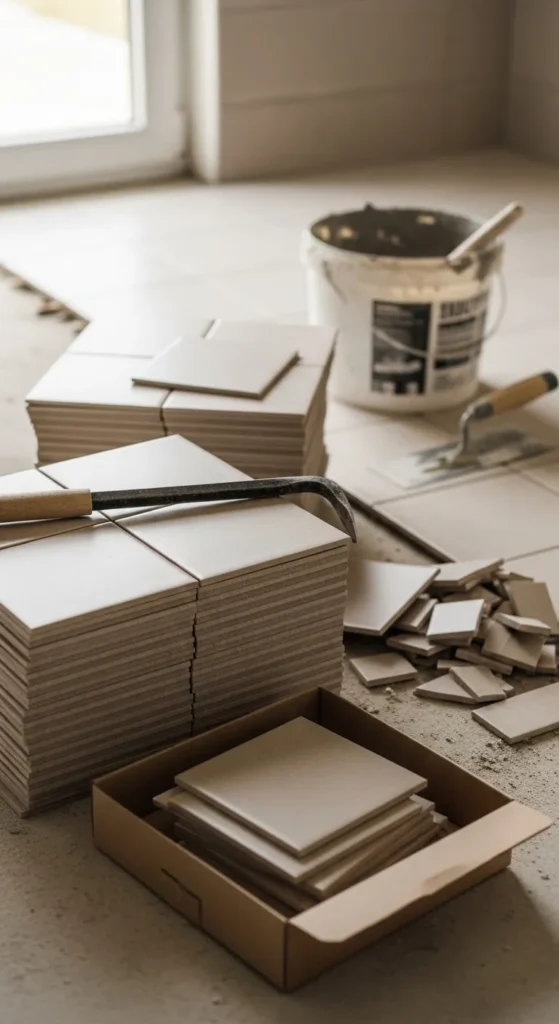
20. Check Tile Box Coverage

Each tile box provides coverage details, which are critical for accurate calculations. Using a tile calculator guide allows you to compare coverage per box against your room dimensions to determine the number of boxes needed. This step prevents over-purchasing or running short during installation. Accurate calculation ensures efficient planning and smooth workflow.
Verifying coverage per box also allows you to account for breaks, cuts, and pattern adjustments. The tile calculator ensures your project uses the correct quantity, maximizing efficiency and minimizing waste. This method simplifies purchasing decisions and guarantees a professional, hassle-free tiling experience.
21. Double-Check Measurements Before Ordering

Before placing your tile order, double-check all measurements using a tile calculator guide. Verifying room dimensions, grout lines, patterns, and extra tiles for waste ensures accuracy and prevents costly mistakes. Accurate double-checking saves money, time, and frustration while giving confidence in your project plan.
Double-checking also helps identify potential errors or overlooked areas. The tile calculator provides a final confirmation of the number of tiles needed. This final step ensures your tiling project runs smoothly, results in a professional finish, and prevents delays caused by incorrect calculations or missing materials.
Conclusion
A tile calculator guide is essential for any tiling project, ensuring accurate measurements, minimal waste, and a professional finish. By carefully measuring your space, selecting the right tile size, accounting for patterns, grout lines, and odd-shaped areas, you can streamline the planning process and reduce stress. Incorporating a tile calculator into your workflow saves time and money while providing peace of mind. Start using these strategies today for precise, efficient, and beautiful tiling results.
Related Posts

24 Replacement Windows Cost Calculator Ultimate Guide
-
Posted by
snighatfatima99@gmail.com