

BLOG
Re-sealing a granite vanity top is a fundamental maintenance task that preserves the beauty and longevity of your natural stone investment. If you notice water no longer beads up on the surface or if dark spots appear after contact with moisture, your stone is likely begging for a fresh layer of protection.
Performing a simple water drop test is the most reliable way to determine if your vanity requires immediate attention. By understanding the science behind surface porosity and the proper application of a high-quality sealant, you can prevent permanent stains and keep your bathroom looking pristine for years to come.
The Mechanics of the Water Drop Test
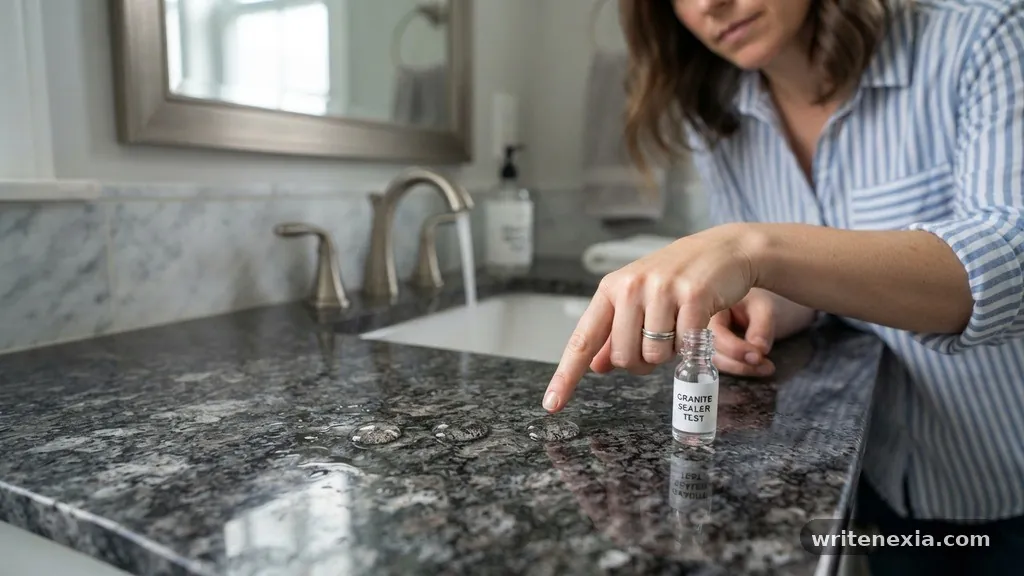
The water drop test is the industry-standard method for evaluating the current level of protection on your stone. To perform this, you must first ensure the vanity is completely clean and free of any soap residue, oils, or dust. Once the surface is dry, pour a small amount of water, roughly the size of a quarter, onto a few different areas of the granite.
Watch these droplets closely for 15 to 20 minutes to observe how the stone reacts to the liquid. If the water beads up clearly on the surface, your existing seal is still effective and does not require intervention.
However, if the water begins to soak into the stone and leaves behind a dark, wet mark, your sealant has worn thin. The depth of the color change indicates how porous the stone has become and how quickly it will absorb other liquids.
If the water disappears into the granite within a few minutes, your surface is highly absorbent and requires immediate resealing. This test is vital because it provides a visual confirmation of the stone’s permeability, which is invisible to the naked eye until damage occurs.
Why Granite Needs Regular Sealing
Granite is a natural stone formed under intense heat and pressure, resulting in a dense but porous crystalline structure. Because it is a product of nature, no two slabs are identical, and some varieties are naturally more porous than others.
These microscopic pores act like tiny tunnels that can pull liquids into the interior of the stone through capillary action. When oils, cosmetics, or cleaning products penetrate these pores, they can leave behind unsightly stains that are notoriously difficult to remove.
Sealing creates a protective barrier that occupies these pores, preventing foreign substances from entering the stone’s matrix. This process does not change the appearance of the granite but significantly increases its resistance to etching and staining.
Without this barrier, your vanity is susceptible to damage from everyday bathroom products like hairspray, toothpaste, and lotions. Regular maintenance ensures that these common household items sit on the surface where they can be wiped away safely.
Selecting the Right Penetrating Sealant
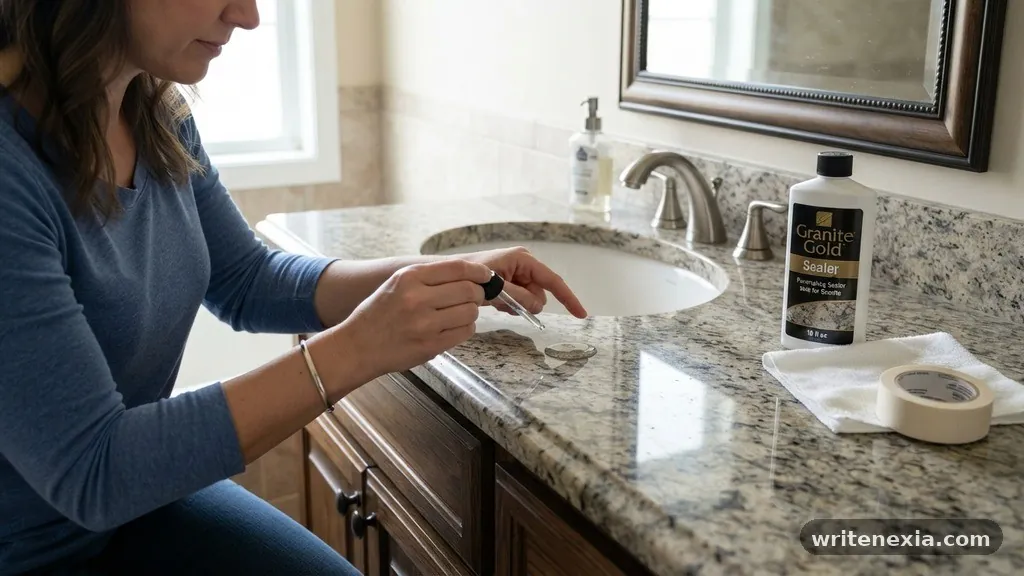
When you decide to proceed with re-sealing a granite vanity top, choosing the correct product is critical for success. You should look for a high-quality penetrating sealer designed specifically for natural stone surfaces.
Unlike topical coatings that sit on top and can peel or yellow over time, penetrating sealers sink deep into the stone’s pores. These products work by lining the internal channels of the granite with a hydrophobic material that repels water and oil-based liquids.
Always check the label to ensure the product is food-safe and suitable for indoor bathroom environments. Many modern sealers are water-based, which makes them easier to apply and less pungent than older solvent-based formulas.
Before applying it to the entire vanity, test the product on an inconspicuous area, such as the back corner near the wall. This allows you to verify that the sealer does not alter the color or finish of your specific granite variety.
Preparing the Surface for Application
Preparation is arguably the most important phase of the entire re-sealing process. If you apply a sealer over a dirty or greasy surface, you will trap contaminants inside the stone, potentially causing permanent discoloration.
Start by using a dedicated stone cleaner or a mild, pH-neutral soap mixed with warm water. Avoid using harsh household cleaners like vinegar, bleach, or ammonia, as these can strip away existing sealant and potentially etch the stone surface.
After washing the vanity thoroughly, rinse it with clean water to remove any soapy film. Dry the area completely with a clean, lint-free microfiber cloth to ensure no moisture remains in the pores.
If you have recently used the sink, allow the granite to sit for several hours to ensure it is bone-dry. Applying a sealer to a damp surface is a common mistake that prevents the product from penetrating the stone effectively.
The Step-by-Step Application Process
Once the surface is clean and dry, apply the sealant evenly across the granite vanity top. You can use a soft cloth, a specialized applicator, or a clean sponge to distribute the liquid.
Work in manageable sections to ensure the sealer doesn’t dry prematurely before it has a chance to soak in. The granite should look visibly wet, but avoid creating large puddles that could cause streaking.
Follow the manufacturer’s specific instructions regarding the dwell time, which is the period the liquid must remain on the surface to be effective. Most products require 5 to 15 minutes of contact time to fully penetrate the stone’s microscopic tunnels.
If the sealer seems to disappear instantly, apply another thin layer to that area, as it indicates a high level of porosity. Consistency during this stage ensures an even layer of protection across the entire vanity.
Removing Excess Sealant
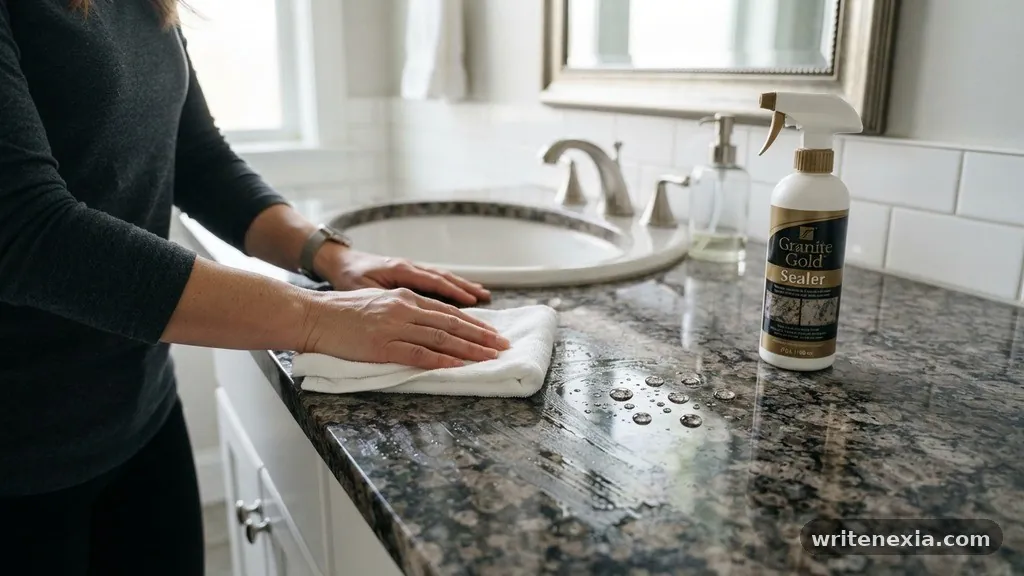
Removing the excess product is essential for achieving a streak-free, professional finish. After the recommended dwell time has passed, use a clean, dry microfiber cloth to buff the surface.
You want to wipe away any liquid that did not soak into the stone to prevent it from drying into a hazy residue. If the surface feels tacky or sticky, you likely left too much sealer on the top, so continue buffing until the granite feels smooth.
It is often helpful to use a second, fresh cloth for the final buffing pass to ensure no lingering product remains. If you notice a hazy film after the granite has completely dried, you can remove it by lightly misting the surface with a bit more sealer and immediately buffing it off.
This reactivates the excess product and allows you to wipe it clean. Proper removal is the final step in restoring the stone’s natural luster and protective barrier.
Comparing Maintenance Schedules
The frequency of re-sealing depends on the type of granite, the color, and the daily usage of the vanity. Lighter-colored stones are generally more porous than darker, denser varieties and may require more frequent maintenance. The table below provides a general guideline for how often you should evaluate your stone’s condition.
| Granite Type | Porosity Level | Typical Re-seal Frequency |
|---|---|---|
| Light-Colored Granite | High | Every 6 to 12 months |
| Dark-Colored Granite | Low | Every 18 to 24 months |
| Honed/Matte Finish | Moderate | Every 12 months |
| Polished Granite | Low | Every 18 to 36 months |
Common Mistakes to Avoid
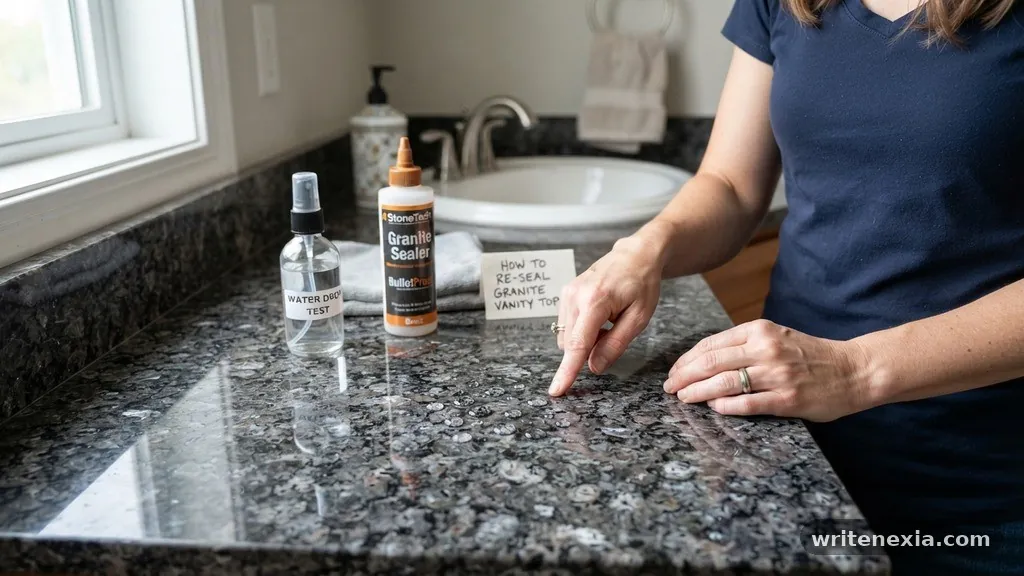
Many homeowners inadvertently damage their granite by using improper cleaning habits between sealing cycles. One of the most frequent errors is using acidic cleaners, which can quickly degrade the protective layer you worked so hard to apply.
Products containing lemon, lime, or citrus scents are often acidic and should be kept away from your stone vanity. Additionally, avoid scrubbing the surface with abrasive pads or steel wool, as these can create microscopic scratches that harbor dirt and moisture.
Another common mistake is neglecting the edges and backsplash of the vanity. These areas are just as porous as the flat top and are often subject to more water splashing from the faucet. When you perform your maintenance, ensure these vertical surfaces receive the same attention and care as the main countertop.
Finally, never assume that a “lifetime” sealer means you never have to worry about maintenance again. Even the best products break down over time due to exposure to chemicals and physical wear.
Recognizing When Your Stone Needs Help
Beyond the water drop test, there are several visual cues that your vanity is overdue for maintenance. If you notice that the stone looks dull or “thirsty,” it is a strong indicator that the protective barrier has faded.
Dark spots that appear after someone washes their hands and linger for a long time are a clear sign of absorption. These spots will eventually dry out, but they indicate that the stone is no longer repelling liquids as it should.
You might also observe water rings forming around soap dispensers or toothbrush holders. These rings are caused by moisture being trapped underneath the object, which slowly leaches into the stone.
If you see these marks, it is time to deep clean the surface and perform a fresh application of sealer. Keeping a close eye on these early warning signs will prevent small, manageable issues from turning into permanent, deep-set stains.
Essential Supplies for Maintenance
To handle the process of re-sealing a granite vanity top effectively, you should keep a small kit of supplies on hand. Having everything ready before you start ensures that you can follow the application steps without interruption. Below is a list of items that are generally necessary for a successful project.
- pH-neutral stone cleaner for pre-application cleaning.
- High-quality penetrating stone sealer suited for granite.
- Several clean, lint-free microfiber cloths for application and buffing.
- A soft-bristle brush or sponge for reaching tight corners.
- Protective gloves to prevent skin irritation from the chemical sealer.
- A small testing dropper or spray bottle for the water test.
Frequently Asked Questions
How can I tell if my granite vanity is sealed?
Perform the water drop test by placing a few small puddles of water on different parts of the counter. If the water beads up, it is sealed; if it absorbs and darkens the stone within 15 minutes, it needs to be resealed.
Can I use a store-bought cleaner to prep the vanity?
Most standard household cleaners are too harsh for granite and can strip existing sealers or damage the stone’s finish. Always use a dedicated stone cleaner or a mild, pH-neutral soap to ensure you don’t cause unintended damage during the cleaning phase.
Does a dark-colored granite vanity need less sealing than a light one?
Generally, yes, because darker granites are often denser and less porous than lighter varieties. However, you should still perform the water drop test annually to be sure, as the mineral composition of every slab varies significantly.
What happens if I don’t wipe away the excess sealer?
If the excess is not wiped away before it dries, it will leave a hazy, sticky, or streaky film on the surface. This is purely cosmetic and can usually be removed by applying a bit more sealer to soften the residue before buffing it off again.
Is it possible to over-seal a granite vanity top?
Yes, applying too much sealer or sealing too frequently can lead to a build-up on the surface. The stone can only absorb a certain amount of product, and anything extra will just sit on the top and create a dull, cloudy appearance that requires extra work to buff away.
Conclusion
Maintaining your home’s stone surfaces doesn’t have to be an intimidating chore. By regularly performing the water drop test, you can stay ahead of potential damage and keep your bathroom vanity looking as good as the day it was installed. Remember that re-sealing a granite vanity top is a simple, cost-effective way to protect your investment from the daily rigors of water exposure and staining.
Take the time to select a quality penetrating sealer and follow the manufacturer’s instructions for the best results. If you notice the stone absorbing water or looking dull, don’t hesitate to clean and reseal the surface.
With a little consistent care, your granite will continue to provide a beautiful, durable, and functional centerpiece for your bathroom. If you have questions about your specific stone type, consult with a professional stone fabricator to ensure you are using the best products for your particular slab.
Leave a Reply
Removing Dried Plumber’s Putty and Silicone Residue from Sinks is a common maintenance task that often feels more daunting than it actually is. Whether you are upgrading your faucet or fixing a persistent leak, dealing with the hardened, crusty remnants left behind by previous installations is essential for a clean, watertight seal on your new components.
This article provides practical, step-by-step techniques to clear these stubborn materials without damaging your sink’s finish. You will learn which household solvents work best, how to safely use mechanical tools, and the professional tricks to ensure your plumbing fixtures sit flush against the basin surface every single time.
Immediate Removal of Hardened Plumber’s Putty
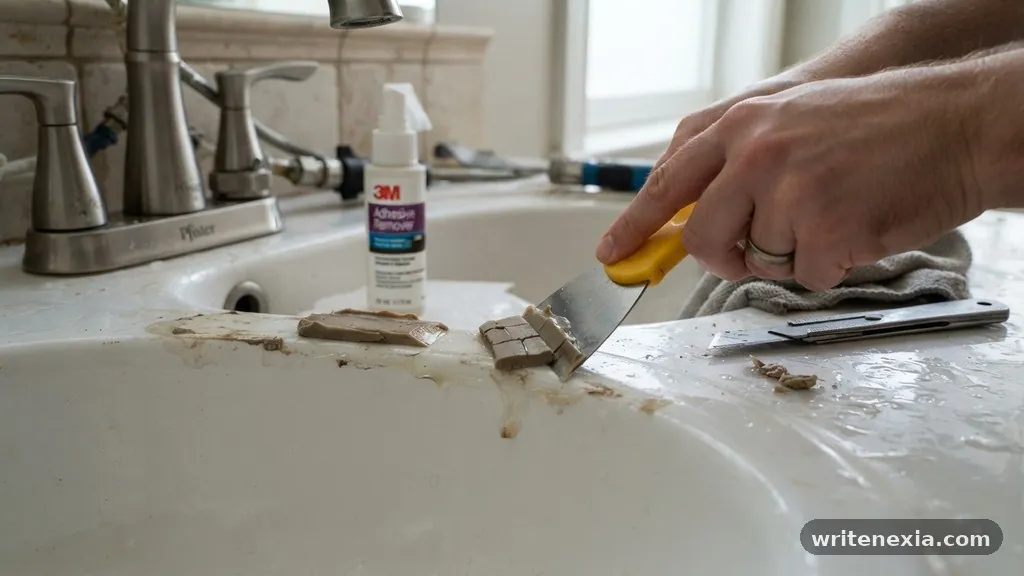
The most effective way to address old, hardened plumber’s putty is to soften it before attempting to scrape it away. Plumber’s putty is oil-based, meaning it will eventually dry out and lose its elasticity over time, turning into a brittle, rock-hard substance that clings to metal and porcelain. You should start by using a plastic putty knife rather than a metal one to avoid scratching the surface of your sink.
If the putty remains stubborn, applying a small amount of heat can often do the trick. Use a hair dryer on a medium setting for about 30 to 60 seconds to warm the material, which helps restore some of its original pliability.
Once the putty feels slightly softer, you can gently pry it up. Most of the residue should come off in large, cohesive chunks rather than crumbling into a thousand tiny pieces.
After the bulk of the material is gone, you might notice a slight oily film remaining on the sink surface. This is common because the oils in the putty soak into microscopic pores in the finish.
You can easily remove this oily residue by wiping the area with a cloth dampened with mineral spirits or simple paint thinner. Always ensure the room is well-ventilated when working with these solvents, and wear gloves to protect your skin from irritation.
Dissolving Silicone Sealant Residue
Silicone is significantly more durable and chemically resistant than putty, making it much harder to remove once it has fully cured. Unlike putty, which softens with heat, silicone usually requires a combination of mechanical scraping and chemical assistance to break its bond. Start by using a sharp razor blade held at a low angle to shave away the thickest layers of the silicone.
Be extremely careful when using a razor blade, especially if your sink is made of acrylic or fiberglass, as these materials scratch very easily. For stainless steel or vitreous china sinks, you have more leeway, but steady hands are still required. Once you have removed the majority of the bulk, you will likely see a thin, transparent layer of silicone still clinging to the metal or ceramic.
To tackle this final layer, you should use a specialized silicone caulk remover or a high-quality solvent. Apply the solution according to the manufacturer’s instructions and let it sit for the recommended duration, typically 10 to 20 minutes.
The chemical will cause the silicone to swell and lose its grip, allowing you to wipe it away with a dry paper towel. Repeat this process if necessary until the surface feels perfectly smooth to the touch.
Tools Required for the Job
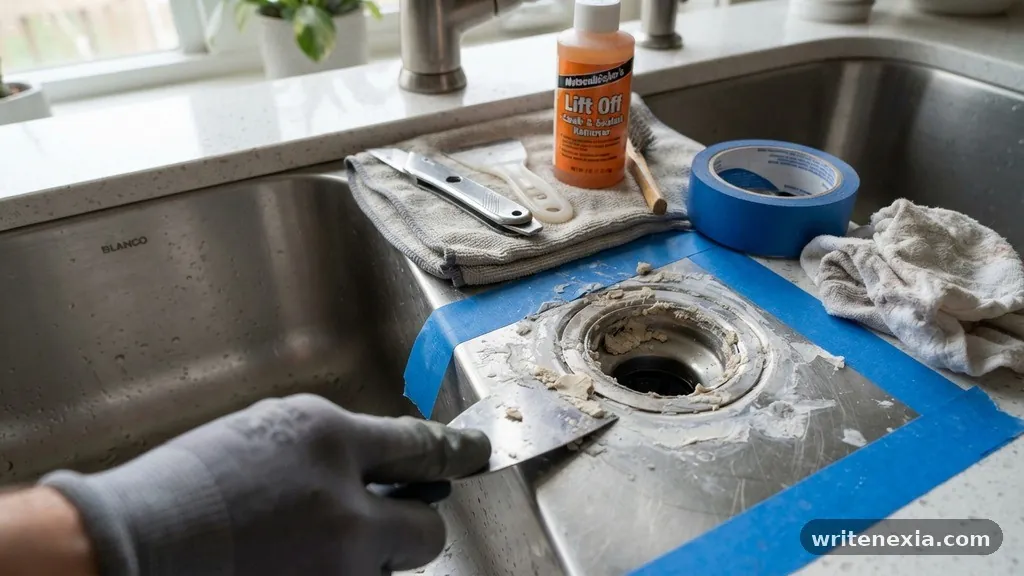
Having the right equipment on hand makes the entire process of removing Dried Plumber’s Putty and Silicone Residue from Sinks significantly faster. You do not need expensive power tools, but using the correct implements prevents damage to your plumbing fixtures. A well-stocked kit ensures you won’t have to stop mid-project to hunt for supplies.
- Plastic putty knife for safe scraping on delicate surfaces.
- Utility knife or razor blade for cutting through thick silicone beads.
- Microfiber cloths for wiping away dissolved debris.
- Mineral spirits or denatured alcohol for cleaning oily residues.
- Nitrile gloves to protect your hands from harsh chemicals.
- A small stiff-bristled nylon brush to reach into tight corners.
- Safety glasses to protect your eyes from flying debris or splashes.
Always keep a stack of paper towels nearby to wipe away the gunk as you scrape. If you allow the removed putty or silicone to sit on the counter or sink surface, it can leave behind unsightly smudges that are harder to clean later. Taking the time to gather these items before you start will lead to a more efficient and professional-looking result.
Comparing Removal Methods
Different materials respond differently to various cleaning agents. Understanding the strengths and weaknesses of each approach helps you choose the best method for your specific sink type. The table below outlines the effectiveness of common removal strategies for these two distinct types of plumbing sealants.
| Method | Best For | Effectiveness | Safety Level |
|---|---|---|---|
| Heat + Plastic Scraper | Plumber’s Putty | High | High |
| Mineral Spirits | Putty Residue | High | Moderate |
| Razor Blade | Cured Silicone | High | Low |
| Silicone Solvent | Silicone Residue | Moderate | Moderate |
As shown in the table, mechanical removal is often the most effective for silicone, while chemical solvents are essential for cleaning up the oily film left by putty. Always test a small, inconspicuous area of your sink with any solvent before applying it to the entire basin. This simple precaution ensures that the chemical will not discolor or damage the finish of your specific sink material.
Safety Precautions During Cleanup
Working with chemical solvents and sharp blades involves inherent risks that you should never ignore. Proper ventilation is the first line of defense when using mineral spirits or commercial silicone removers. Open a window or turn on the exhaust fan in your bathroom or kitchen to ensure that fumes do not build up in the confined space.
Protecting your skin is equally important, as these solvents can strip away natural oils and cause dermatitis. Wearing chemical-resistant nitrile gloves is a standard practice among professional plumbers.
If you happen to get any solvent on your skin, wash the area thoroughly with soap and water immediately. Avoid using these chemicals near open flames or pilot lights, as most solvents are highly flammable.
When using a razor blade, always cut away from your body and keep your fingers clear of the blade’s path. If you find yourself applying too much pressure, stop and re-evaluate your technique.
You might need to apply more solvent to soften the material further rather than forcing the blade through. Remember that patience is your best tool when dealing with stubborn, long-standing sealant residue.
Cleaning Stainless Steel Sinks
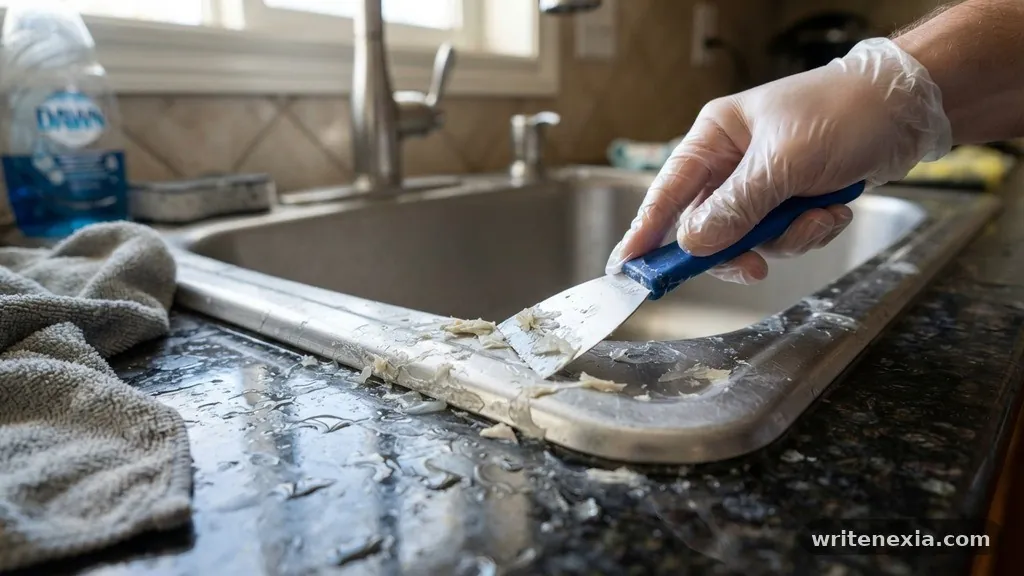
Stainless steel is a common material for kitchen sinks, and it is generally quite resilient. However, it can still suffer from scratches if you use abrasive scouring pads or metal scrapers.
When removing residue from stainless steel, focus on using plastic tools and chemical solvents to do the heavy lifting. The goal is to lift the sealant away from the steel surface without leaving permanent marks.
If you have stubborn spots that won’t come off, you can use a fine-grit nylon scrubbing pad. Be sure to scrub in the direction of the metal’s grain to maintain the original finish.
After you have successfully removed the putty or silicone, wash the entire sink area with warm, soapy water. This removes any chemical residue and leaves the steel looking bright and clean.
Avoid using steel wool on stainless steel, as tiny iron particles can become embedded in the surface and cause rust spots to develop over time. If you do notice minor surface scratches, a specialized stainless steel polish can often hide them effectively. Keep the surface dry after cleaning to prevent water spots from forming while the sink is empty.
Addressing Porcelain and Enamel Sinks
Porcelain and enamel surfaces are harder than metal but are prone to chipping if struck by a hard tool. When working on these surfaces, avoid using metal scrapers entirely.
A rigid plastic scraper or even a credit card can provide enough leverage to remove old putty without damaging the vitreous finish. If you must use a blade, hold it at an extremely flat angle to minimize the risk of gouging the enamel.
Porcelain is resistant to most chemicals, so you have more freedom in choosing your cleaning agents. Mineral spirits and even heavy-duty degreasers work well on these surfaces. If you have deep-seated stains around the drain flange, a paste made of baking soda and water can act as a mild abrasive to gently lift the discoloration.
Always dry the sink thoroughly after cleaning. If you leave water sitting on an old, worn enamel sink, it can eventually cause oxidation or rust if the metal beneath the enamel has been exposed. By taking care during the removal process, you ensure that the integrity of the porcelain remains intact for many more years of use.
Removing Residue from Drain Flanges
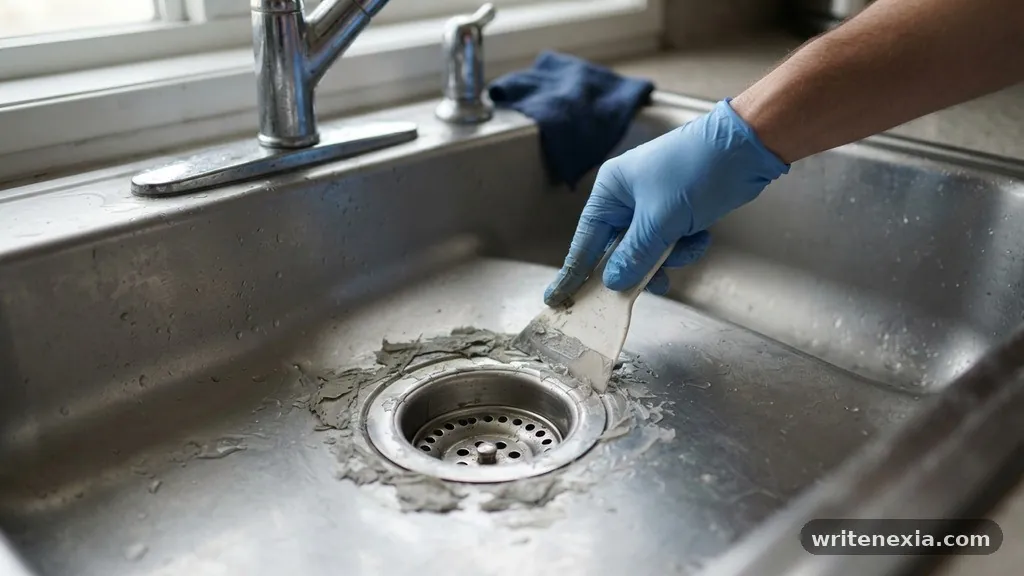
Often, the most difficult residue to remove is located in the crevice between the drain flange and the sink floor. This area is tight and hard to reach, which makes it a magnet for old putty and grime.
To clean this effectively, you may need to disassemble the drain assembly entirely. Once the flange is removed, you can easily clean both the sink surface and the underside of the flange itself.
If you prefer not to remove the drain, use a small, stiff-bristled brush dipped in mineral spirits to scrub the gap. A toothpick or a dental pick can be useful for digging out hardened putty that has worked its way deep into the threads. Take your time, as clearing this area is essential for ensuring that your new seal will be watertight.
If the flange itself is covered in crusty, old material, soak it in a container of hot, soapy water for an hour. This often loosens the debris enough that it can be wiped away with a cloth. If the flange shows signs of severe corrosion, this is the perfect time to replace it with a new one rather than trying to salvage the old, damaged part.
Preventing Future Buildup
The best way to deal with sealant residue is to ensure the next installation is done correctly. When installing a new drain or faucet, use only the recommended amount of plumber’s putty.
A common mistake is to use too much, which leads to excess material squeezing out from under the fixture. This excess is what eventually becomes the crusty residue you have to clean up later.
Before applying the new seal, ensure that the mating surfaces are completely clean and dry. Any moisture or dust trapped beneath the putty or silicone will prevent a proper bond, leading to leaks. If you are using silicone, be aware that it cures very quickly, so you must position your fixture accurately on the first attempt.
Consider the environment of your sink when choosing a sealant. Plumber’s putty is excellent for drain flanges because it remains flexible for a long time, but it should never be used on plastic or marble surfaces, as it can stain or crack them. Silicone is more versatile but is much harder to remove, so reserve it for areas where a permanent, waterproof bond is truly required.
Common Mistakes to Avoid
Many DIYers make the mistake of using harsh acids or abrasive cleaners that are not meant for plumbing fixtures. For example, some people try to use drain cleaners to soften putty, but these chemicals are designed to eat through organic matter, not mineral-based sealants. They can also damage the finish of your sink and the seals inside your pipes.
Another frequent error is rushing the process. If you try to scrape off silicone before it has been sufficiently softened by a solvent, you will likely end up with a messy, uneven surface.
Patience allows the chemistry to work for you, making the physical labor much easier. Always follow the instructions on your cleaning products, as some require a specific dwell time to be effective.
Lastly, do not ignore small leaks during the installation process. If you see water seeping out after you have tightened the drain, do not try to “patch” it with more putty from the outside.
You must disassemble the connection, clean the surfaces thoroughly, and re-apply the sealant properly. Doing it right the first time saves you hours of frustration and potential water damage to your cabinets.
Frequently Asked Questions
Does vinegar dissolve plumber’s putty?
No, vinegar is not effective at dissolving plumber’s putty. Because putty is oil-based, it requires a solvent like mineral spirits or paint thinner to break down the oily bond. Vinegar is acidic and might actually harm certain sink finishes without softening the putty at all.
Can I use a metal scraper on a porcelain sink?
It is highly recommended that you do not use metal scrapers on porcelain sinks. Even if you are careful, a single slip can cause a permanent scratch or chip in the enamel. Always use a plastic putty knife or a stiff plastic card to remove residue safely.
How do I know if I should use putty or silicone?
Use plumber‘s putty for drain flanges and basket strainers, as it stays flexible and is easy to remove if you need to fix a leak later. Use silicone for areas that require a permanent, high-strength waterproof bond, such as where a sink meets the countertop or for mounting certain types of faucets.
Is it possible to remove silicone without a chemical solvent?
Yes, it is possible to remove silicone using only mechanical means, such as a razor blade or a specialized silicone removal tool. However, this is time-consuming and carries a higher risk of scratching the sink surface. Using a solvent makes the process much cleaner and reduces the risk of damage.
What should I do if the putty has stained my sink?
If the putty has left an oily stain, try cleaning it with a degreasing dish soap first. If that doesn’t work, a gentle abrasive like baking soda mixed with a little water can often lift the stain. For stubborn marks on stainless steel, a dedicated stainless steel cleaner is usually effective.
Summary and Next Steps
Removing Dried Plumber’s Putty and Silicone Residue from Sinks is a manageable project when you use the right tools and techniques. By softening stubborn putty with heat or mineral spirits and carefully cutting away cured silicone, you restore your fixtures to a pristine state. Always prioritize surface safety by using plastic tools on delicate finishes and wearing appropriate protective gear.
A clean, residue-free surface is the foundation of any successful plumbing installation, ensuring that your new seals hold tight and remain leak-free. If you follow these steps, you will find that the process is straightforward and yields professional-quality results.
Take your time, work methodically, and enjoy the satisfaction of a job done correctly. If you need further advice on specific sink materials, feel free to reach out to a local professional for guidance.
One thought on “How to Remove Dried Plumber’s Putty and Silicone Residue from Sinks”
Leave a Reply
Deciding on the right dimensions for your vanity is a critical step in bathroom renovation, as understanding the standard front and side overhang for a vanity countertop ensures both aesthetic appeal and daily functionality. A well-measured vanity top provides enough clearance for doors and drawers while preventing water from dripping directly onto the cabinet face.
Whether you are working with custom stone or a pre-fabricated unit, these measurements dictate the final look of your space. This article breaks down the industry norms, helping you make informed decisions that balance style with practical utility during your next project.
Determining the appropriate extension beyond the cabinet face is the first step in successful installation. For most residential bathroom projects, the industry consensus for the standard front and side overhang for a vanity countertop is between 1 inch and 1.5 inches. This measurement is calculated from the front face of the cabinet doors or drawers, not the cabinet frame itself.
By allowing the stone to project slightly, you create a visual shadow line that gives the vanity a finished, professional appearance. This spacing also helps protect the wood cabinetry from accidental splashes, as water is more likely to drip to the floor rather than pooling on the door fronts.
Front Overhang Considerations 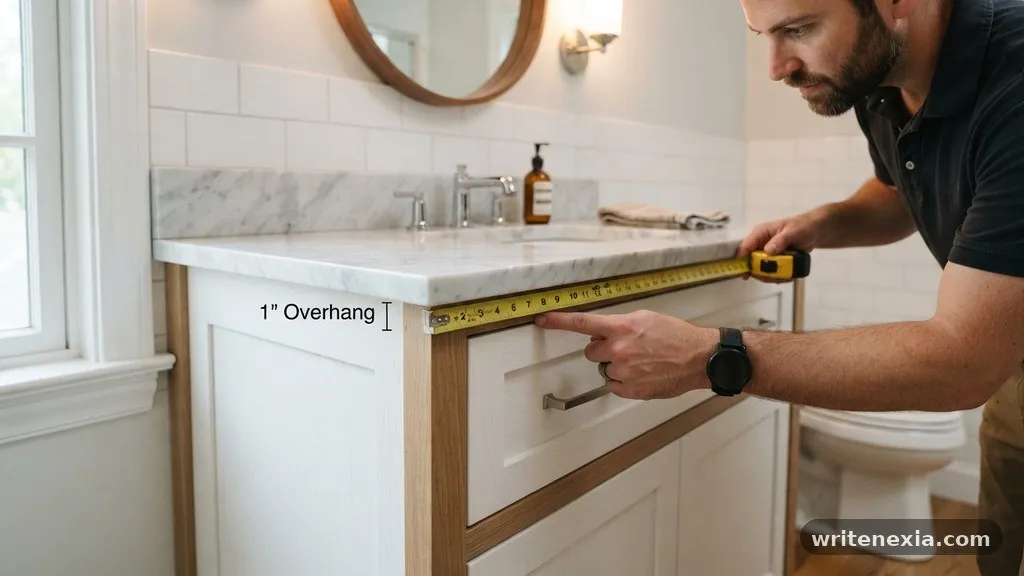
The front projection is primarily about protecting your cabinetry and ensuring ease of use. A 1-inch overhang is generally considered the minimum to keep water away from the cabinet doors.
If you have a decorative cabinet front or hardware that protrudes significantly, you might find that a slightly larger overhang is necessary for clearance. However, exceeding 1.5 inches can sometimes make the countertop feel flimsy or prone to cracking if the stone is not properly supported. Always account for the thickness of your drawer fronts when calculating this distance, as they often sit slightly proud of the cabinet frame.
Side Overhang and Wall Clearance
Side overhangs are governed by the placement of the vanity within the room.
If the vanity sits in a corner or between two walls, the side overhang is typically reduced to 0 inches or a very small 0.25-inch gap to account for walls that are rarely perfectly plumb. When the vanity is freestanding or placed at the end of a run, a side overhang of 1 inch is common to match the front projection. This creates a cohesive look that wraps the edge of the cabinet nicely.
If the side of the vanity is exposed, ensure the edge profile matches the front to maintain design consistency.
Why Measurements Matter for Stone 
When working with heavy materials like granite, marble, or quartz, the overhang is not just a design choice but a structural one. Stone is brittle and can snap if it has too much unsupported weight extending past the cabinet. If you opt for an overhang greater than 2 inches, you will almost certainly require additional corbels or steel support brackets.
These supports prevent the stone from cracking under the weight of a heavy sink or accidental pressure from a user leaning on the edge. Always consult with your fabricator before finalizing a design that exceeds standard dimensions.
Comparing Countertop Projection Standards
Understanding how these measurements compare across different installation types helps clarify expectations.
While the bathroom vanity has specific needs, kitchen counters often follow different rules due to the presence of appliances and seating areas. The following table provides a quick reference for typical overhang expectations in various configurations.
| Application | Standard Front Overhang | Side Overhang (Exposed) |
|---|---|---|
| Bathroom Vanity | 1.0″ – 1.5″ | 1.0″ |
| Kitchen Base Cabinet | 1.0″ – 1.25″ | 1.0″ |
| Kitchen Breakfast Bar | 10.0″ – 12.0″ | N/A |
| Wall-to-Wall Vanity | 1.0″ | 0″ (Butted) |
The Impact of Cabinet Door Styles
The style of your cabinet doors significantly influences how you measure your overhang. Traditional face-frame cabinets have doors that sit flush with the frame, making the calculation straightforward. In contrast, full-overlay doors cover the entire frame, meaning the door surface is nearly flush with the cabinet box. If you have full-overlay doors, you must ensure the countertop overhangs the door itself, not just the box. Failure to account for the thickness of the door can lead to the countertop looking too short or flush, which ruins the desired shadow line effect.
Addressing Out-of-Plumb Walls
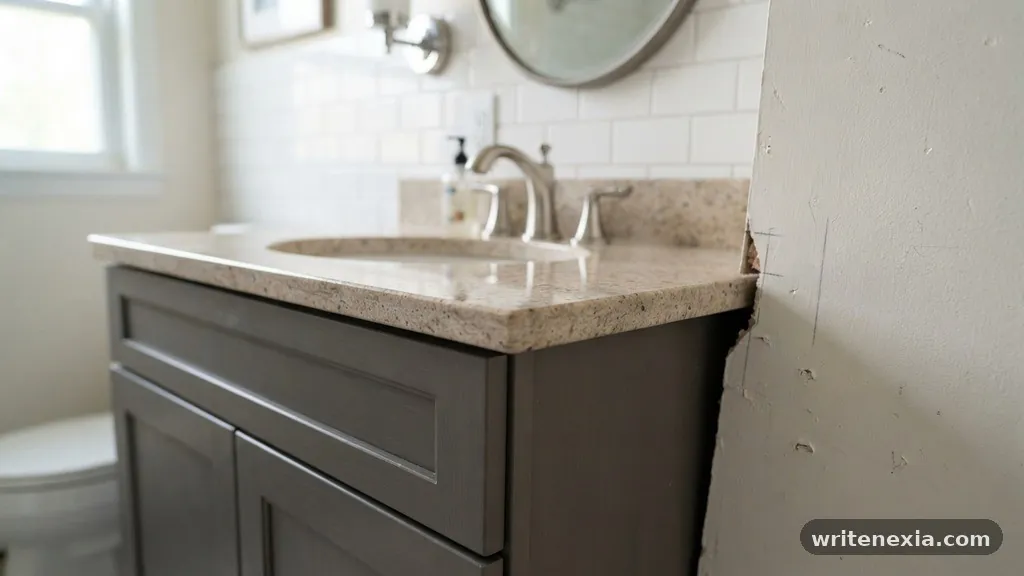
Walls in older homes are rarely perfectly square, which complicates the process of achieving a standard overhang. When you measure for a vanity top, it is common to find that the distance from the wall to the front of the cabinet varies by a quarter-inch or more. Professional installers use a process called templating to capture these irregularities. By creating a physical template of the space, they can scribe the stone to fit perfectly against the wall. This ensures that the overhang remains consistent across the entire length of the vanity, even if the wall is bowed.
Sink Placement and Edge Profiles
The placement of your sink within the vanity top also dictates how much space you have for an overhang. If you are using an undermount sink, you need to ensure there is enough room for the sink clips and the bowl itself without interfering with the cabinet walls. The edge profile you choose—whether it is a simple eased edge, a bullnose, or a more decorative ogee—can also affect how the overhang is perceived. A rounded bullnose profile often makes a 1-inch overhang look slightly smaller than a sharp, squared-off eased edge.
Managing Backsplash Requirements
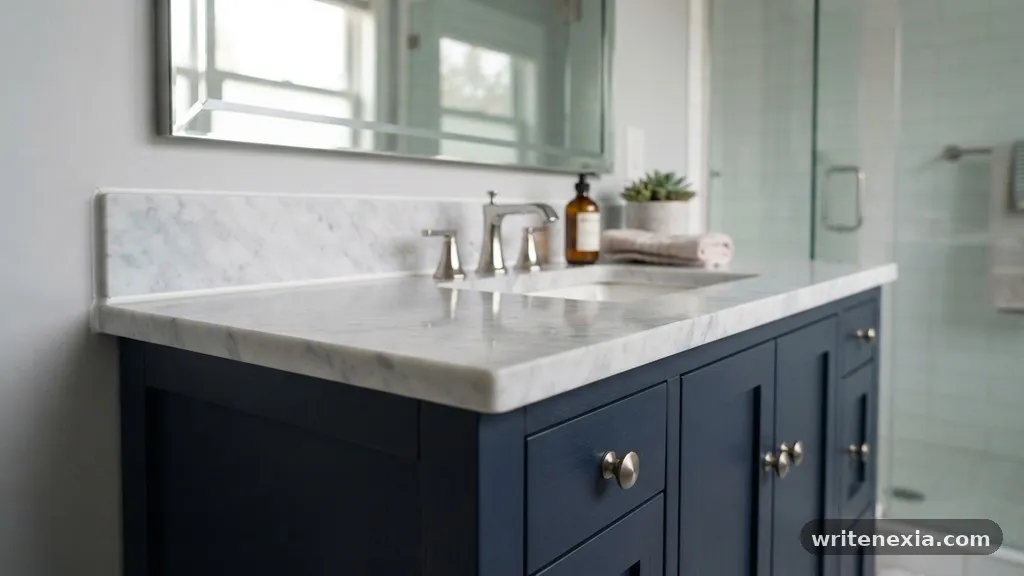
Many homeowners forget that the backsplash affects the total depth of the countertop. If you are installing a thick tile backsplash, it will push the vanity top forward, effectively increasing your front overhang if you don’t adjust the initial measurements. Always measure the depth of your vanity cabinet, add your desired front overhang, and then subtract the depth of your backsplash. This calculation ensures that your finished countertop depth is exactly what you planned. If you skip this step, you may end up with a vanity that sticks out further into the room than intended.
Common Mistakes to Avoid
One of the most frequent errors is failing to account for the thickness of the vanity hardware. Large, protruding drawer pulls can catch on clothing or towels if the countertop overhang is too shallow. Another mistake is assuming that all vanity tops are cut with the exact same dimensions regardless of the cabinet depth. Some modern, slim-profile vanities require a smaller overhang to maintain a sleek, contemporary aesthetic. Always double-check your cabinet specs against the stone slab dimensions before the final cut is made.
Necessary Tools for Measuring
To get these measurements right, you need the right tools. A high-quality metal tape measure is essential, as cloth versions can stretch and lead to inaccurate readings. A digital laser measure can be helpful for checking the distance between two walls, as it eliminates the potential for the tape to sag or bend. A framing square is also vital for ensuring that the corners of your vanity are truly at 90-degree angles. If your walls are not square, a contour gauge can help you transfer the exact shape of the wall to your template.
Frequently Asked Questions
Does the overhang include the backsplash?
No, the standard front and side overhang measurements are calculated independently of the backsplash. When you are measuring the total depth of your stone, you must add the front overhang to the cabinet depth and then factor in the space required for the backsplash at the rear.
Can I have a 2-inch overhang without extra support?
It is generally not recommended for stone materials like marble or granite. While some quartz varieties are stronger, a 2-inch extension creates a significant lever arm that can cause the material to crack under stress. If you desire a deeper look, use steel support brackets or corbels.
Is it okay to have no side overhang?
Yes, it is perfectly acceptable to have zero side overhang if the vanity is installed between two walls. This is often referred to as a “butted” installation. In these cases, you should use a bead of silicone caulk to seal the joint between the stone and the wall.
How do I measure for a vanity that isn’t square?
You should use a physical template made of luan or heavy cardboard to trace the exact shape of the wall and cabinet. This template allows you to scribe the stone edges to match the wall’s irregularities, ensuring a tight fit and a consistent, professional-looking overhang.
Does the sink shape affect the overhang?
The sink shape does not typically affect the overhang, but the sink size does. You must ensure that the bowl of the sink does not conflict with the cabinet walls or the vanity’s drawer assembly, which might limit how far back the sink can be positioned.
Conclusion
Achieving the correct dimensions for your vanity is a blend of technical accuracy and aesthetic preference. By sticking to the standard front and side overhang for a vanity countertop—typically 1 to 1.5 inches—you ensure that your bathroom remains both functional and visually balanced. Remember to account for variables like wall squareness, door thickness, and backsplash depth during your planning phase. Taking the time to measure carefully before ordering your stone will save you from costly modifications and installation headaches down the line. If you are ever in doubt, consult with a professional fabricator who can provide guidance based on the specific material you have selected for your home.
11 thoughts on “What Is the Standard Front and Side Overhang for a Vanity Countertop?”
-
[url=https://remont-dvig124.ru]Ремонт двигателей[/url] — профессиональный ремонт и диагностика двигателей автомобилей.
Ремонт двигателя возвращает автомобилю надежность и стабильную работу.Диагностические работы стартуют с компьютерной проверки и внешнего осмотра мотора.
Далее двигатель проверяют в работе на стенде либо непосредственно на автомобиле.
Плавный режим работы способствует корректной притирке новых деталей.
-
Росгвардия охрана объектов — это надежное решение для обеспечения безопасности вашей собственности, тарифы на вневедомственную охрану.
Деятельность Росгвардии обеспечивает защиту имущества и сохранность важных объектов по всей стране. -
Росгвардия охрана объектов — это надежное решение для обеспечения безопасности вашей собственности, вневедомственная охрана услуги.
Деятельность Росгвардии обеспечивает защиту имущества и сохранность важных объектов по всей стране. -
Росгвардия охрана объектов — это надежное решение для обеспечения безопасности вашей собственности, вневедомственная охрана Москва.
Ключевым элементом охраны являются современные системы видеонаблюдения и сигнализации, а также подготовленные охранники. -
Росгвардия охрана объектов — это надежное решение для обеспечения безопасности вашей собственности, вневедомственная охрана московской области.
Работа Росгвардии включает в себя контроль за порядком и предотвращение правонарушений на объектах. -
Росгвардия охрана объектов — это надежное решение для обеспечения безопасности вашей собственности, вневедомственная охрана цена.
В число охраняемых объектов входят предприятия инфраструктуры, правительственные здания и жилые комплексы. -
Росгвардия охрана объектов — это надежное решение для обеспечения безопасности вашей собственности, росгвардия вневедомственная охрана росгвардии.
Все мероприятия по обеспечению безопасности проводятся по строгим стандартам и инструкциям Росгвардии. -
Росгвардия охрана объектов — это надежное решение для обеспечения безопасности вашей собственности, вневедомственная охрана росгвардии.
Охрана объектов невозможна без регулярного контроля и профилактических мероприятий Росгвардии. -
Росгвардия охрана объектов — это надежное решение для обеспечения безопасности вашей собственности, вневедомственная охрана росгвардии.
Для эффективной защиты используются современные технические средства и профессиональные кадры. -
Росгвардия охрана объектов — это надежное решение для обеспечения безопасности вашей собственности, вневедомственная охрана росгвардии цена.
Охрана объектов невозможна без регулярного контроля и профилактических мероприятий Росгвардии. -
Росгвардия охрана объектов — это надежное решение для обеспечения безопасности вашей собственности, росгвардия охрана объектов.
Правильная организация охраны способствует предотвращению преступных действий и нарушений.


Leave a Reply
Determining whether Bar Keepers Friend is safe to use on quartz bathroom vanities is a common concern for homeowners looking to maintain their surfaces without causing permanent damage. Many people reach for this popular product because of its reputation for tackling tough grime in other areas of the house. However, quartz is a unique material that requires specific care protocols to remain in pristine condition.
Understanding the chemical composition of your vanity is the first step in protecting your investment. If you have ever wondered if your favorite scrubbing agent is compatible with engineered stone, you are in the right place to get the facts you need.
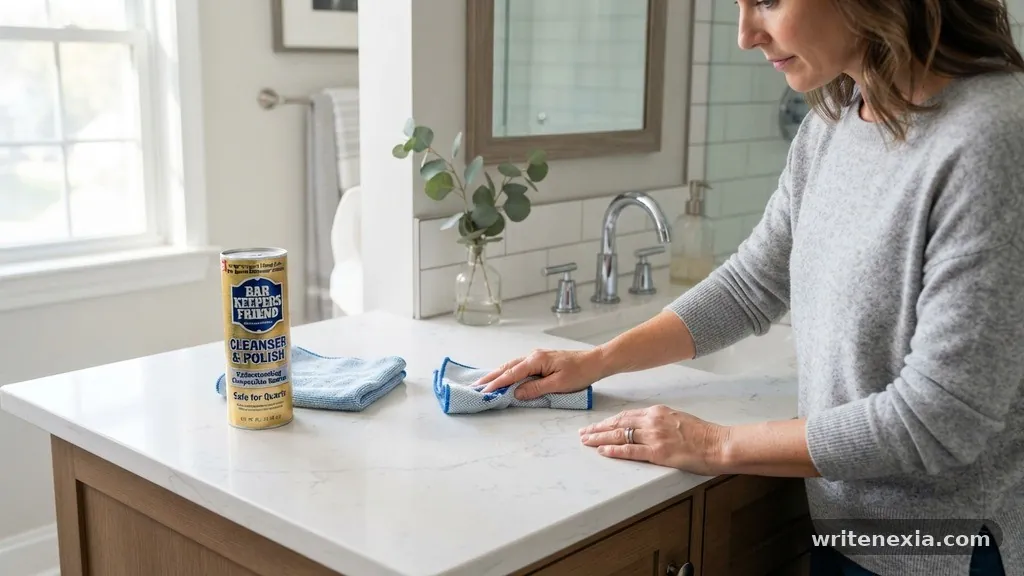
The short answer is that the original Bar Keepers Friend powder cleanser is generally not recommended for use on quartz bathroom vanities because it is abrasive. While it works wonders on stainless steel or porcelain, the physical grit in the powder can leave micro-scratches on the resin-based surface of quartz. These tiny abrasions dull the finish over time, making the countertop look cloudy or worn.
Using such a harsh product can permanently ruin the polished aesthetic you worked hard to achieve. Instead of relying on aggressive scouring agents, you should focus on pH-neutral cleaning solutions that preserve the integrity of the sealant and the stone itself.
Understanding the Composition of Quartz Surfaces
Quartz countertops are not entirely natural stone; they are engineered products. They consist of approximately 90% to 93% crushed quartz aggregate bound together by high-quality polymer resins and pigments.
This manufacturing process creates a non-porous surface that is highly resistant to staining and moisture. Because the resin acts as the glue holding the stone together, it is the most vulnerable part of your vanity.
Chemical cleaners that are too acidic or too alkaline can break down these resins. If the resin begins to degrade, the vanity loses its luster and becomes susceptible to deep stains.
Traditional scouring powders often contain minerals like feldspar or silica, which are harder than the resin binder. When you scrub, you are effectively sanding down the surface of your countertop.
Over time, this process creates a visible haze that cannot be buffed out easily. While the stone itself is hard, the finish is what gives the vanity its shine and smoothness.
Protecting that finish requires avoiding anything that relies on physical friction to lift stains. You should treat your quartz vanity more like a sensitive piece of furniture than a heavy-duty industrial sink.
Why Abrasive Cleansers Cause Damage
The primary mechanism behind Bar Keepers Friend is its ability to use mild acid and abrasive particles to remove rust and mineral deposits. On metal surfaces, this is a distinct advantage.
On quartz, however, the abrasives act like sandpaper. Even if the scratches are invisible to the naked eye at first, they accumulate with every cleaning session.
Once the surface is scratched, it becomes much easier for dirt and soap scum to settle into the grooves. You will find yourself needing to clean more frequently, which leads to more scrubbing and more damage.
This creates a cycle of degradation that eventually ruins the reflective quality of the quartz. Professional installers often warn against using any product labeled as a “scouring powder” on these specific surfaces.
Furthermore, the acidic nature of many heavy-duty cleaners can etch the surface. Etching is a chemical burn that creates dull spots where the polish has been eaten away.
Once a surface is etched, it often requires professional refinishing to restore the original appearance. Avoiding harsh chemicals altogether is the most cost-effective way to ensure your vanity lasts for decades.
Safe Alternatives for Daily Maintenance
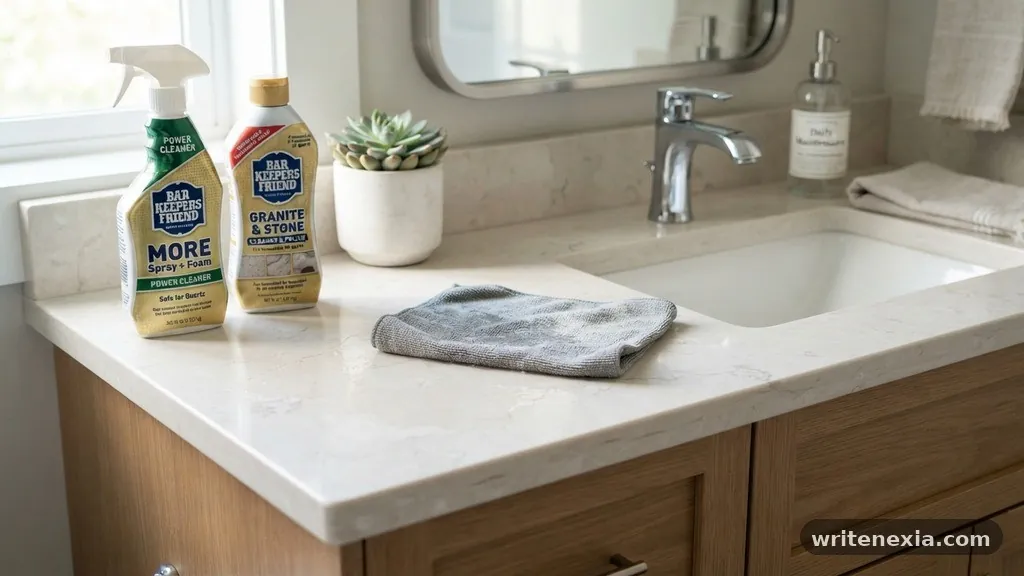
Maintaining a clean vanity does not require heavy-duty chemistry. For daily spills and toothpaste residue, a simple mixture of warm water and a drop of mild dish soap is usually sufficient. Use a soft microfiber cloth to wipe the area, which prevents the scratching associated with rough sponges or steel wool.
If you have stubborn spots, you can use a dedicated stone cleaner designed specifically for engineered stone. These products are formulated to be pH-neutral, meaning they won’t damage the resin or the stone aggregate. Many of these cleaners also leave behind a streak-free shine that enhances the natural beauty of the quartz.
Consistency is more important than strength when it comes to cleaning. By wiping down the vanity after every use, you prevent the buildup of soap scum and hard water deposits. This proactive approach eliminates the need for aggressive products in the future.
Comparing Common Cleaning Methods
To understand why some products are safer than others, it is helpful to look at how different cleaning agents interact with quartz. The following table provides a breakdown of common cleaning categories and their impact on your bathroom vanity.
| Cleaning Product Type | Safety Level | Impact on Quartz |
|---|---|---|
| Mild Dish Soap & Water | Excellent | Safe for daily use; no residue. |
| pH-Neutral Stone Cleaner | Excellent | Maintains polish; prevents buildup. |
| Vinegar or Lemon Juice | Poor | Acidic; can dull the finish over time. |
| Abrasive Powder Cleansers | Very Poor | Causes micro-scratches and dulling. |
| Bleach-based Cleaners | Poor | Risk of discoloration; harsh on resins. |
As indicated by the data, sticking to pH-neutral or mild soap-based cleaners is the gold standard. While vinegar is a popular natural cleaner, its acidity is high enough to damage the polished finish of quartz. Always prioritize products that explicitly state they are safe for engineered stone or natural stone.
Identifying the Correct Bar Keepers Friend Product
It is important to note that the company does manufacture a product line specifically for stone surfaces. If you are a fan of the brand’s performance, you should look for the “Granite & Stone Cleaner & Polish” version instead of the traditional powder. This specific iteration is formulated to be non-abrasive and pH-neutral.
Before applying any new product, always test it in an inconspicuous area. A good spot to choose is inside a cabinet or near the back corner of the vanity where it won’t be seen. Wait for the surface to dry completely before assessing if there is any change in the finish or color.
If the test area remains clear and glossy, you can proceed with confidence. However, if you notice any cloudiness, you should stop using the product immediately. Even among stone-safe cleaners, the chemical makeup can vary significantly between brands.
How to Remove Tough Stains Safely
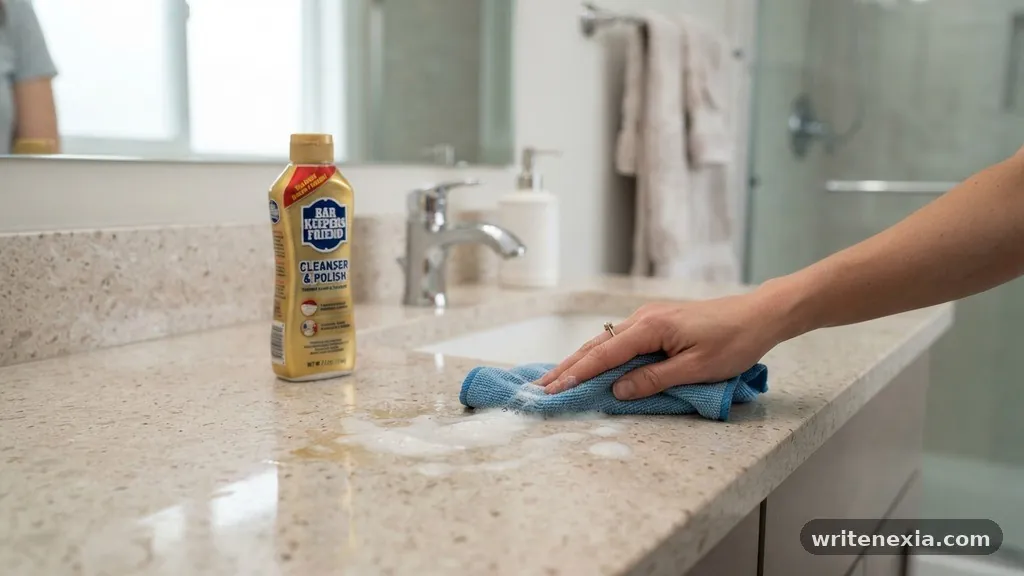
Sometimes, even with the best care, a stubborn stain like hair dye or makeup will settle into the surface. Instead of reaching for a scouring powder, try using an isopropyl alcohol solution. Apply a small amount to a soft cloth and gently blot the stain.
For dried-on materials like nail polish or adhesives, a plastic putty knife can be a safe tool. Because plastic is softer than quartz, it will not scratch the finish if used carefully. Avoid using metal scrapers or razor blades, as these can easily gouge the surface.
If the stain persists, contact the manufacturer of your quartz vanity. Many companies provide specific cleaning kits or recommendations for their particular brand of engineered stone. They have tested their surfaces against various agents and can offer the most accurate advice for your specific product.
The Risks of Ignoring Manufacturer Guidelines
Most quartz manufacturers include a care and maintenance guide with their products. These guides often explicitly forbid the use of abrasive cleansers or high-pH chemicals. Ignoring these instructions can void your warranty, which is a significant financial risk.
Warranties for high-end quartz are often valid for 10 to 15 years, provided the owner follows proper maintenance procedures. If you use a prohibited product and damage the surface, the manufacturer may deny a claim for repairs or replacement. It is always better to follow the recommended protocols to protect your rights as a consumer.
Furthermore, using the wrong cleaner can affect the appearance of the veining or patterns in your quartz. Some aggressive chemicals can cause pigments to shift or fade, leading to uneven coloration. Once the aesthetic is compromised, it is rarely reversible.
Essential Cleaning Supplies List

To keep your bathroom vanity in top shape, you should assemble a small kit of safe tools. Having these items on hand makes it easier to clean regularly without scrambling for the wrong supplies. Here is what you should keep under your sink:
- Microfiber cloths for gentle wiping and polishing.
- A spray bottle filled with a mixture of water and mild dish soap.
- A dedicated, pH-neutral stone cleaner for deep cleaning.
- Plastic scrapers for removing dried residue without scratching.
- Isopropyl alcohol for sanitizing and removing oily stains.
- A soft-bristled brush for cleaning around the faucet base.
Using these items will ensure your vanity remains as beautiful as the day it was installed. Avoid the temptation to use scouring pads, steel wool, or abrasive chemicals found in the kitchen cleaning cabinet. Your quartz vanity is a durable surface, but it is not indestructible.
The Importance of Proper Rinsing
Even when using safe cleaning agents, it is vital to rinse the surface thoroughly. Any soap residue left on the countertop can attract dust and dirt, leading to a grimy appearance. Use a clean, damp cloth to wipe away any leftover soap after you have finished cleaning.
Follow this by buffing the area with a dry, clean microfiber cloth. This step removes water spots and brings out the natural shine of the quartz. If you live in an area with hard water, this step is especially important to prevent mineral deposits from forming on your vanity.
Water quality can vary significantly, and some tap water contains high levels of calcium and magnesium. If you notice white spots appearing, these are likely mineral deposits. A quick wipe-down with a specialized stone cleaner can remove these before they become a persistent problem.
Frequently Asked Questions
Will Bar Keepers Friend scratch my quartz vanity?
Yes, the traditional powder version is abrasive and will likely cause micro-scratches on your quartz vanity over time. These scratches dull the finish and make the surface look cloudy or hazy. It is highly recommended to avoid using the powder cleanser on any engineered stone surfaces to maintain their original luster.
What is the best way to clean my quartz bathroom vanity?
The most effective and safest method for daily cleaning is using a mixture of warm water and a drop of mild dish soap. Use a soft microfiber cloth to wipe the surface and follow up with a dry cloth to prevent water spots. For more intensive cleaning, use a product specifically labeled for stone surfaces that is pH-neutral.
Can I use bleach on my quartz countertop?
Bleach is generally not recommended for quartz because it is harsh and can damage the resins that hold the stone together. It may cause discoloration or dulling of the finish, especially if left on for an extended period. Stick to mild soaps or dedicated stone cleaners to avoid long-term damage.
How do I remove stubborn stains from quartz?
For tough stains, you can try blotting the area with a small amount of isopropyl alcohol on a soft cloth. If the stain remains, use a plastic putty knife to gently scrape away any hardened debris. Never use metal tools or abrasive scouring powders, as these will permanently damage the surface finish.
Does the brand of quartz matter when choosing a cleaner?
While most quartz surfaces are similar in composition, some brands use different types of resins or additives. It is always wise to check the specific care guide provided by the manufacturer of your vanity. They will offer the most accurate advice regarding which cleaners are safe and which should be avoided to keep your warranty intact.
Maintaining Your Vanity for the Future
Keeping your bathroom vanity in excellent condition is a matter of choosing the right tools and being consistent with your routine. While it is tempting to use powerful household cleaners to save time, the damage they cause to quartz is often permanent. By avoiding abrasive products and focusing on gentle, pH-neutral solutions, you ensure that your vanity maintains its beauty and value.
Remember that the question of whether it is safe to use Bar Keepers Friend on quartz bathroom vanities is best answered with caution. While there are specific stone-safe versions of the product, the traditional powder is not suitable for your needs.
Stick to the recommended supplies, follow the manufacturer’s guidelines, and you will enjoy a pristine vanity for years to come. If you have questions about a specific stain or cleaning issue, don’t hesitate to reach out to a professional stone care specialist or the vanity manufacturer for tailored advice.
Leave a Reply
Choosing between an undermount sink vs drop-in sink for thin countertops requires a clear understanding of structural load and material integrity. If you are working with materials like thin laminate, tile, or delicate stone, the weight distribution and mounting method become critical factors in preventing cracks or water damage.
While the sleek aesthetic of an undermount model is popular, a drop-in sink often provides the necessary mechanical support for thinner surfaces. This article explains the technical trade-offs between these two styles to help you decide which is safer for your specific kitchen or bathroom project.
The Core Difference in Mounting Mechanics
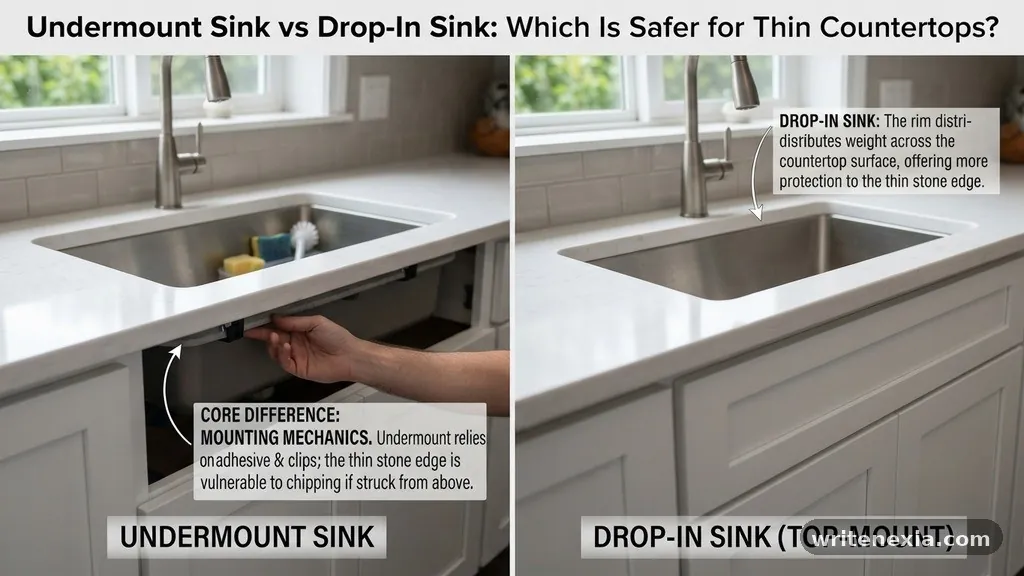
The primary distinction between these two styles lies in how the basin attaches to your surface. A drop-in sink, often called a top-mount, features a prominent rim that rests directly on top of the counter.
This rim carries the weight of the sink and its contents, transferring the load to the structure beneath. Because the countertop material itself does not have to support the entire weight of the basin from underneath, this method is inherently more stable for fragile or thin materials.
In contrast, an undermount sink attaches to the underside of the counter using clips, anchors, and industrial-grade epoxy. The countertop must be strong enough to hold the sink’s weight, the weight of the water, and the force exerted by the faucet.
When your surface is thin, this creates a significant risk of stress fractures or complete failure. You are essentially asking the material to act as a structural support beam, which many thin materials are not designed to do.
Evaluating Structural Load on Thin Surfaces
Thin countertops, such as those made from 1.5cm stone or budget-friendly laminate, are highly susceptible to cracking near sink cutouts. When you install an undermount sink, you remove material right up to the edge of the basin.
This leaves a narrow strip of stone or composite that must support the sink’s entire vertical load. If the adhesive fails or the stone has a natural weak point, the weight can snap that narrow strip.
Drop-in sinks avoid this issue by distributing the weight across the wider surface area of the counter surrounding the cutout. The lip of the sink covers the edge, which actually adds a layer of protection against chips and cracks.
If your countertop is less than 2cm thick, the mechanical advantage of the top-mount design is significant. It acts as a bridge, reinforcing the perimeter of the cutout rather than relying on the structural integrity of the narrow edge.
Comparing Installation Requirements
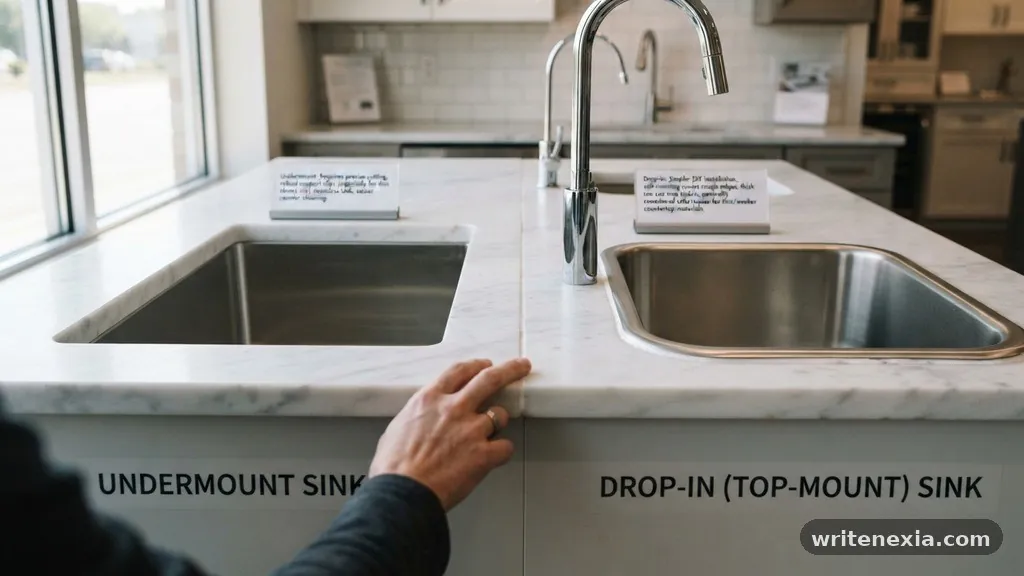
Installing an undermount sink requires a high level of precision and, in many cases, professional assistance. The cutout must be perfectly polished and finished because the edge is visible from underneath and to the side.
You also need to ensure the mounting system is compatible with the specific thickness of your material. If your counter is too thin, standard clips might not even have enough material to bite into, forcing you to rely solely on epoxy.
Drop-in installations are generally more forgiving for DIY projects and thinner materials. You simply drop the sink into the hole, secure it with clips, and seal the rim with a bead of silicone.
This process does not require specialized tools for polishing the interior edge of the stone. If you are working with a material that is difficult to cut or prone to splintering, the drop-in approach is the safer bet for a clean, long-lasting finish.
Maintenance and Water Seepage Risks
One of the biggest concerns with any sink installation is water damage. With a drop-in sink, the rim sits above the counter, which theoretically keeps water from pooling at the edge.
However, the caulk line between the rim and the counter can deteriorate over time, allowing water to seep into the substrate. If you have a laminate or wood counter, this can lead to swelling and rot if the seal isn’t maintained.
Undermount sinks offer a cleaner look but present different maintenance challenges. Because there is no rim, you can wipe crumbs directly into the basin, which is a major convenience.
The downside is the exposed edge of the countertop material, which is constantly exposed to moisture. If the silicone seal between the sink and the stone fails, water will migrate into the underside of the counter, potentially causing delamination or structural weakening.
Material Suitability for Different Countertops
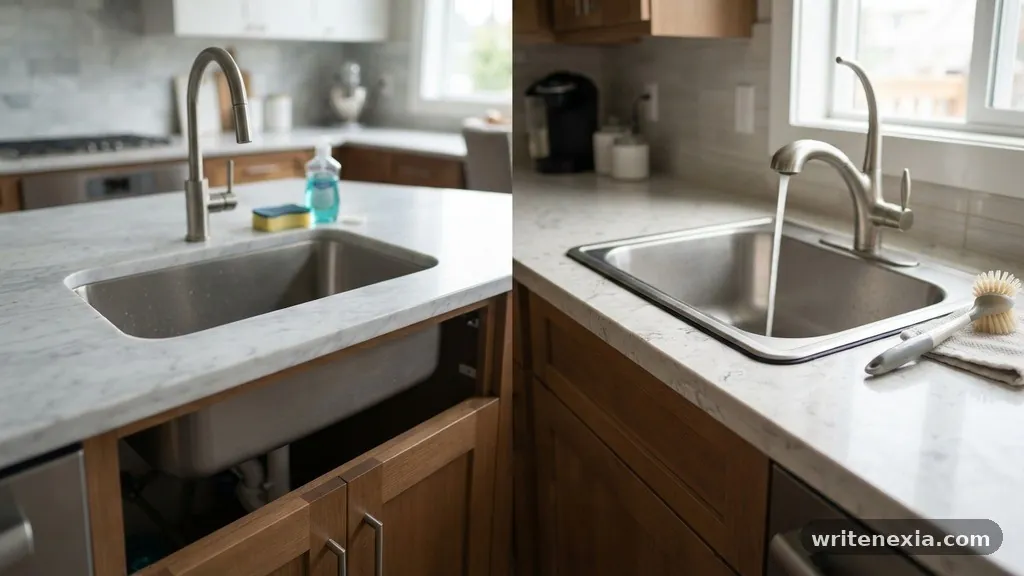
The choice of sink is often dictated by the countertop material you select. Granite, quartz, and marble are common choices, but their thickness varies significantly.
Solid surfaces like Corian are often used in thinner profiles, which might struggle with the weight of a heavy, water-filled undermount basin. Laminate, while versatile, is almost exclusively paired with drop-in sinks because the core material is susceptible to moisture.
| Countertop Material | Recommended Sink Style | Why? |
|---|---|---|
| Natural Stone (Thin) | Drop-in | Prevents edge cracking |
| Laminate | Drop-in | Protects exposed core |
| Thick Quartz (3cm+) | Undermount | Structural strength allows it |
| Solid Surface | Integrated or Undermount | Seamless bonding capability |
Aesthetics versus Practicality
Many homeowners gravitate toward undermount sinks because of their modern, minimalist appearance. They create a seamless transition from the counter to the sink, which is a hallmark of high-end kitchen design.
This look is undoubtedly popular in real estate listings and can influence the perceived value of a home. However, you must balance this visual preference against the reality of your countertop’s physical limitations.
A drop-in sink is often viewed as more traditional or utilitarian, but modern designs have come a long way. There are now low-profile, “flush-mount” drop-in sinks that sit nearly level with the counter.
These provide a much cleaner aesthetic than the old-fashioned, bulky rims of the past. If you want the modern look but are worried about the safety of an undermount installation on a thin surface, these low-profile options are a perfect middle ground.
Long-Term Durability and Repair
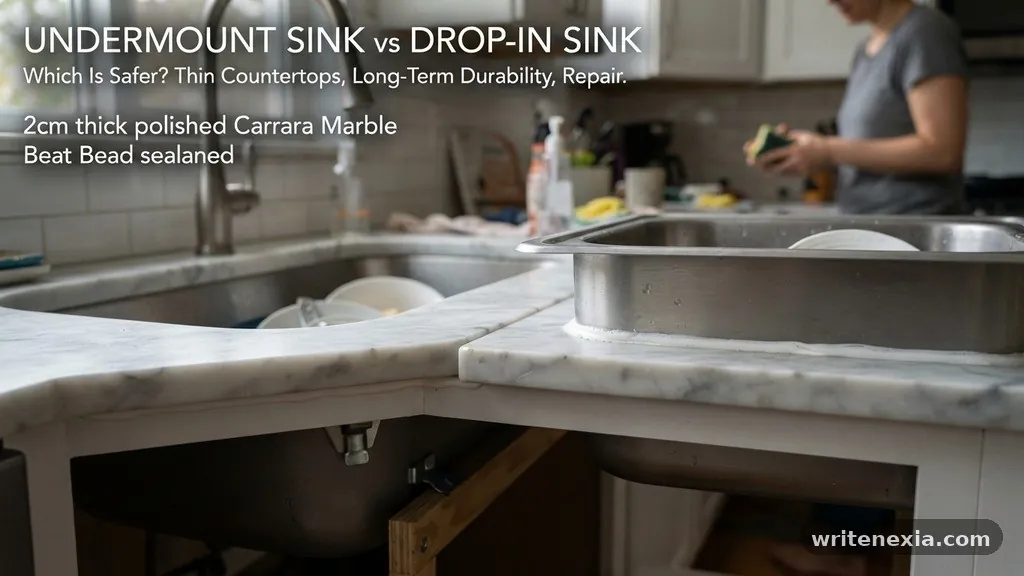
When an undermount sink fails, the repair process is often invasive and expensive. If the adhesive bond breaks, you may need to remove the entire plumbing setup and re-bond the sink, which risks damaging the stone cutout.
In severe cases, the weight of the falling sink can crack the countertop, leading to a total replacement of the surface. This is a rare occurrence with a properly installed unit, but it is a genuine risk for thin, brittle materials.
Drop-in sinks are much easier to replace or repair. Because the sink is not glued to the underside, you can simply remove the clips, cut the sealant, and lift the sink out.
This is a significant advantage if you decide to upgrade your faucet or sink basin years down the line. For those who prioritize long-term flexibility and low repair costs, the drop-in design is far more practical.
Common Mistakes to Avoid
Many DIYers fail when they assume all countertops are strong enough to support an undermount basin. They might pick a beautiful, thin slab of marble and insist on an undermount sink, only to find the stone cracking during the first year of use.
Always consult with your fabricator regarding the minimum thickness requirements for an undermount installation. If they advise against it, listen to their expertise to avoid a costly disaster.
Another common error involves using the wrong type of adhesive or sealant. Undermount sinks require high-strength, waterproof epoxy that can withstand constant temperature fluctuations from hot water.
Using standard bathroom caulk for an undermount sink is a recipe for failure. Ensure that your installer uses a professional-grade product that is rated for the specific weight and material of your sink.
Key Considerations for Your Decision
* Countertop Thickness: Anything under 2cm is generally unsafe for heavy undermount basins without extra reinforcement.
* Material Type: Porous materials like wood or cheap laminate should almost always use a drop-in sink to protect the edges.
* Budget: Undermount sinks require more labor for the cutout and polishing, increasing the cost of installation.
* Replacement Frequency: If you plan to update your kitchen in the future, drop-in sinks allow for easier swaps.
* Weight of the Sink: Cast iron sinks are extremely heavy and place a much larger burden on the counter than stainless steel.
FAQ
Is it possible to reinforce thin countertops for an undermount sink?
Yes, it is possible to add structural support, such as plywood sub-layers or metal rails, to the underside of the counter. This creates a stronger base for the sink clips to anchor into. However, this adds complexity and cost to the installation process. You should only attempt this if you have clear instructions from a professional fabricator.
Do drop-in sinks always look outdated?
Not necessarily. While the thick, plastic-rimmed sinks of the 1980s are certainly out of style, modern top-mount sinks feature ultra-thin, stainless steel rims. These are designed to be barely noticeable and can provide a very sleek, contemporary look. They offer the safety of a drop-in installation with a much more refined visual profile.
Can I install an undermount sink on a laminate countertop?
While some specialized products allow for this, it is generally discouraged. Laminate is made of layers of paper and resin, which can absorb water if the edge is exposed. Even with a perfect seal, the risk of water damage to the core is high. Most experts recommend sticking with a drop-in sink for any laminate surface to ensure long-term durability.
Which sink is easier to keep clean?
Undermount sinks are generally easier to keep clean because they lack a raised rim. You can sweep water and debris directly from the counter into the sink without hitting a lip. However, the underside of the counter edge can accumulate grime if not wiped regularly. Drop-in sinks require more effort to wipe around the rim where it meets the counter.
Does the weight of the faucet affect my choice?
Yes, the faucet adds weight and mechanical stress to the countertop cutout. If you have a heavy, commercial-style pull-down faucet, it will exert a lot of force on the material. When combined with an undermount sink on a thin counter, this creates a “weak point” that can lead to cracking. A drop-in sink helps mitigate this by providing a solid, supported frame for both the sink and the faucet.
Final Thoughts
The debate regarding an undermount sink vs drop-in sink is ultimately a matter of matching your hardware to the physical limitations of your materials. While the undermount style offers a desirable, clean look, it places a significant structural burden on your countertop. If you are working with thin or delicate materials, a drop-in sink provides the necessary mechanical stability to ensure your kitchen remains functional for years.
Consider your specific countertop thickness and your long-term maintenance preferences before committing to a design. Taking the time to evaluate these factors now will save you from the stress of structural repairs later. Whether you choose the seamless look of an undermount or the practical security of a drop-in, prioritize the integrity of your surface to ensure a lasting result.
Leave a Reply
Determining how much weight can a floating vanity countertop support without brackets is a critical calculation for any bathroom renovation project. While the aesthetic appeal of a wall-mounted unit lies in its minimalist, gravity-defying appearance, homeowners often worry about the structural integrity of the countertop itself. Without visible support hardware, you are essentially relying on the mechanical connection between the cabinetry and the wall studs to distribute the load.
Understanding the material limitations, wall construction, and the physics of cantilevered surfaces is essential before you begin your installation. In this article, we will examine the actual load-bearing capacities of various materials and the risks associated with mounting heavy countertops without dedicated support brackets.
The Direct Answer
If you are asking how much weight can a floating vanity countertop support without brackets, the short answer is that you should assume a near-zero load capacity for any significant weight beyond the material’s own mass. A countertop that is not supported by brackets, corbels, or an internal steel frame is essentially a cantilevered beam. Without structural reinforcement, even a moderately heavy stone top risks snapping at the weakest point—usually near the wall attachment—or pulling the screws directly out of the drywall and studs.
If you must go without visible brackets, you must use hidden steel plates or internal wall-mounted frames. Relying solely on the vanity cabinet structure is dangerous, as most cabinet boxes are made of thin plywood or particleboard that will sag under the weight of stone or heavy composite materials.
The Role of Wall Construction

The foundation of any floating installation is the wall behind the vanity. In most modern home construction, walls are framed with 2×4 or 2×6 wooden studs spaced 16 inches on center. If your vanity is anchored directly into these studs using high-quality lag bolts, you gain a significant amount of leverage.
However, the connection point—where the vanity meets the wall—becomes the fulcrum. Any weight placed on the edge of the countertop creates a rotational force, known as torque, which attempts to pull the top of the vanity away from the wall.
If you are mounting a vanity to a wall that has been reinforced with a horizontal piece of blocking, your chances of success increase dramatically. Professional installers often open the wall cavity to install heavy-duty plywood blocking between the studs before finishing the drywall. Without this internal reinforcement, you are limited by the strength of the wood studs and the pull-out resistance of your fasteners.
If your wall is made of metal studs, the load capacity is drastically lower than that of wood-framed walls. Metal studs are thin and prone to deformation under the concentrated stress of a heavy vanity.
Material Weight and Structural Stress
Different countertop materials exert different levels of stress on a vanity unit. Granite and marble are exceptionally heavy, often weighing between 12 and 18 pounds per square foot depending on the thickness.
A standard 48-inch vanity top can easily weigh over 100 pounds before you even factor in the weight of a ceramic sink or a faucet. When you add water in the sink and the weight of someone leaning on the counter, the total load can quickly exceed 200 pounds.
Engineered stone, such as quartz, offers a slightly more uniform structure but carries similar weight characteristics to natural stone. Solid surface materials like Corian are lighter, but they can still flex over long, unsupported spans. Laminate is the lightest option, but it lacks the rigidity of stone and will bow or sag over time if it is not fully supported across its entire length.
When calculating how much weight can a floating vanity countertop support without brackets, you must account for the static load of the material itself. If the material is too heavy, the vanity cabinet will experience “creep,” a slow deformation that occurs under constant stress.
Why Brackets are Recommended

While the visual goal is a clean, bracket-free look, professional contractors almost always recommend internal support mechanisms. The term “without brackets” is often a misnomer; what people actually desire is “hidden support.”
This can be achieved through the use of heavy-duty steel plates that are routed into the top of the vanity or hidden within the wall structure. These plates provide the necessary rigidity to prevent the countertop from cracking at the sink cut-out, which is the most vulnerable point of any vanity top.
Without any form of support, the sink cut-out leaves only a few inches of material on the front and back edges. This narrow strip is extremely fragile. If someone leans on the front edge of the counter, the pressure is concentrated on this thin section of material.
Over time, hairline cracks will almost certainly develop at the corners of the sink opening. Using hidden steel supports distributes this weight across the entire wall structure, effectively turning the vanity into a floating shelf capable of supporting hundreds of pounds.
Comparing Load-Bearing Methods
To understand the difference in support, we can look at the common ways homeowners attempt to mount their vanities. The following table illustrates the typical weight capacities and reliability of different installation methods.
| Installation Method | Estimated Load Capacity | Structural Reliability |
|---|---|---|
| Direct to Drywall (No studs) | 0-10 lbs | High Failure Risk |
| Direct to Wood Studs (No brackets) | 20-40 lbs | Low (Sagging likely) |
| Hidden Steel Plate Supports | 200-400 lbs | High |
| Visible Decorative Brackets | 300-500+ lbs | Very High |
As shown in the table, attempting to support a heavy countertop without some form of structural reinforcement is rarely successful. Even if the unit stays on the wall, the vanity cabinet will likely pull away from the mounting surface. This results in a gap between the backsplash and the wall, which can lead to water infiltration and mold growth inside the wall cavity.
The Danger of Sink Cut-outs
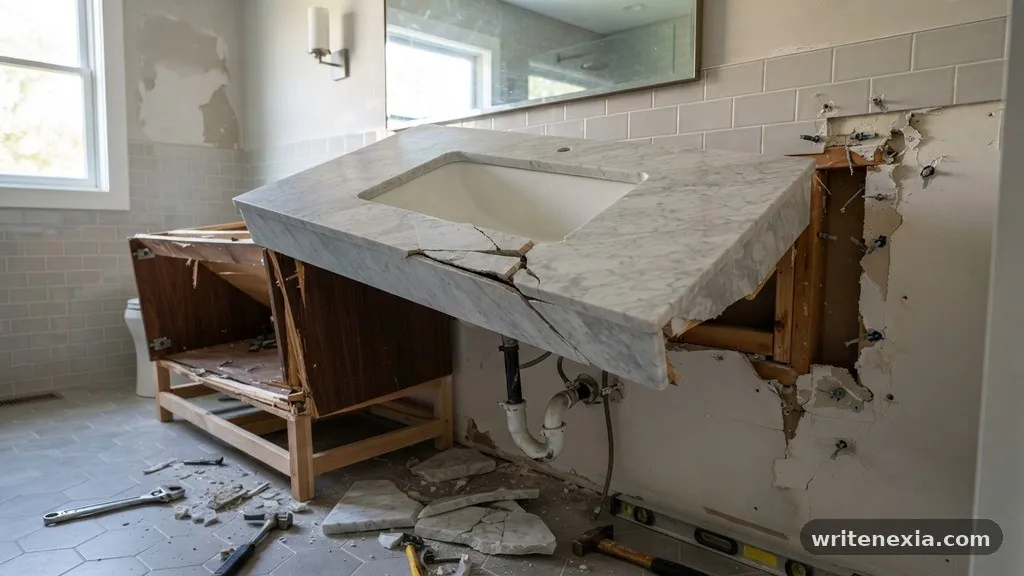
The sink cut-out is the primary reason why floating vanities fail. When you cut a large hole in the center of a countertop, you remove the material that provides the most structural stability. In a standard vanity, the weight is transferred down through the legs to the floor.
In a floating vanity, that path is broken. The weight of the sink, the faucet, and the plumbing must be transferred horizontally to the wall.
If you are using a heavy cast-iron or ceramic vessel sink, the weight is concentrated in the center of the span. Without support, the center of the vanity will sag. This sag is not always immediate.
It can happen over several months as the temperature and humidity levels in the bathroom fluctuate. Stone countertops are especially susceptible to this, as they have low tensile strength. They can snap cleanly in half if the support is uneven.
Leverage and Torque Principles
Physics dictates that the further the countertop extends from the wall, the greater the force on the fasteners. This is known as a lever arm.
A countertop that extends 20 inches from the wall creates significantly more torque than one that extends only 12 inches. If you are designing a custom floating vanity, keeping the depth to a minimum is a simple way to reduce the stress on your anchors.
Most standard bathroom vanities are 21 to 22 inches deep. This depth creates a substantial lever arm. If you are determined to avoid visible brackets, you must ensure that the internal frame of the vanity is constructed from structural-grade plywood or solid timber.
You should also use high-tensile-strength lag screws that penetrate at least 2.5 inches into the center of the wall studs. Never rely on wood screws, which have lower shear strength and are prone to snapping under sudden loads.
Common Materials and Their Limitations
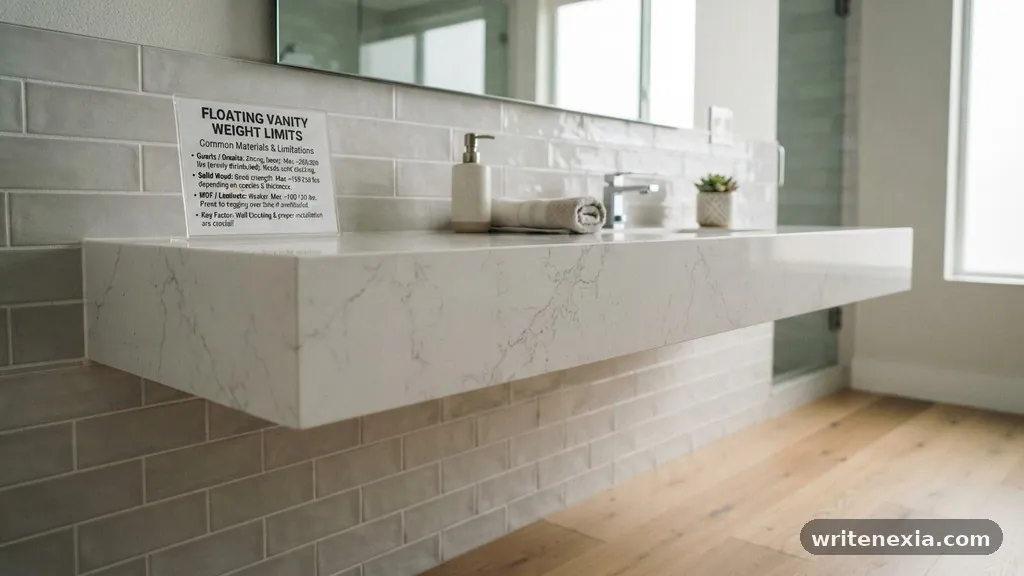
Not all materials perform equally when suspended. Granite is prone to invisible micro-fractures that can expand under stress.
Quartz is more flexible but can still crack if the support is uneven. Solid wood is perhaps the most forgiving material, as it can flex slightly without breaking, but it is prone to warping in the high-humidity environment of a bathroom.
If you choose a heavy material, you must be prepared to install reinforcement. If you choose a lighter material, you still need to ensure the vanity box itself is rigid. Many “floating” kits sold in big-box stores are made of medium-density fiberboard (MDF).
MDF is notorious for its poor fastener-holding capability. If you tighten a bolt into MDF, it can easily tear out, leading to a catastrophic failure of the entire unit. Always opt for solid wood or high-grade plywood cabinets if you are planning a floating installation.
Checklist for a Successful Installation
Before you finalize your design, review this list of requirements to ensure your vanity remains securely on the wall.
- Verify that your wall studs are made of solid wood and not metal or composite.
- Ensure your cabinet box is constructed from plywood or solid wood, avoiding MDF where possible.
- Install horizontal blocking between studs if your current wall layout does not align with the vanity mounting points.
- Use structural lag bolts or heavy-duty mounting hardware rather than standard wood screws.
- Incorporate hidden steel supports or L-brackets that are routed into the top of the vanity frame.
- Seal the gap between the vanity and the wall with high-quality, flexible silicone to prevent water damage.
- Test the installation with a static weight load equivalent to your expected daily use before finishing the plumbing.
Following these steps will prevent the most common causes of failure. While you might want to avoid visible hardware, never compromise on the structural integrity of the mounting system. Your safety and the longevity of your bathroom renovation depend on it.
Addressing Common Concerns
When planning a project of this nature, homeowners often have similar questions regarding the feasibility and safety of their designs.
Is it safe to lean on a floating vanity?
It is generally safe to lean on a floating vanity only if it has been installed with structural steel supports that are anchored directly to the wall studs. If the vanity is mounted only using the cabinet box, you should never put your full body weight on it, as the risk of the unit pulling away from the wall is significant.
How do I know if my wall studs can support the weight?
You can verify the strength of your wall by checking the condition of the wood. If the studs are dry, free of rot, and at least 3.5 inches thick (standard 2×4), they are typically sufficient to hold a standard vanity. If you see signs of water damage or if the studs are spaced wider than 16 inches, you should add additional blocking before proceeding.
Can I use adhesives instead of screws for a floating vanity?
Adhesives should never be used as the primary support for a floating vanity. While construction adhesive can help bridge small gaps and prevent movement, it cannot support the shear weight of a vanity, sink, and countertop. Always use mechanical fasteners as the primary means of support.
What is the most reliable way to hide support brackets?
The most reliable method is to use heavy-duty steel “T” or “L” brackets that are installed directly onto the wall studs before the drywall is finished. These brackets then sit hidden inside the vanity cabinet, providing a rigid platform for the countertop to rest upon while remaining completely invisible from the outside.
Does the weight of the sink affect the vanity’s stability?
Yes, the sink is one of the heaviest components of your vanity. A heavy stone or ceramic sink adds significant weight to the center of the span, which increases the pressure on the mounting points. Always ensure that the support system is designed to handle the combined weight of the countertop, the sink, and the fixtures.
Conclusion
Evaluating how much weight can a floating vanity countertop support without brackets reveals that the answer is rarely enough for a functional bathroom. While the sleek look of a floating unit is highly desirable, the physics of a cantilevered surface requires robust, hidden support. Relying solely on the cabinet box to hold the weight of heavy stone or composite materials is a recipe for structural failure and potential damage to your bathroom walls.
By incorporating hidden steel supports and ensuring your vanity is anchored securely to wall studs, you can achieve the aesthetic you want without sacrificing safety. Take the time to reinforce your wall blocking and choose high-quality materials to ensure your installation lasts for years. If you have questions about your specific wall type or countertop weight, consulting with a professional carpenter is always the best way to ensure your project is built to last.
One thought on “How Much Weight Can a Floating Vanity Countertop Support Without Brackets?”
-
This place totally caught my attention from day one. The games load quickly and the graphics are top notch. I appreciate how they rotate their promotions so I never get bored. Support team is super helpful and responds within minutes. Definitely my favorite online setup right now. mm777slot

Leave a Reply
Deciding whether you can cut a pre-cut vanity top down from 37 inches to 35 inches is a common dilemma when your bathroom layout doesn’t match standard retail sizes. This adjustment is physically possible, but the success of the project depends entirely on the specific material of your countertop and your access to the right cutting tools. Taking two inches off a vanity top requires precision to avoid cracking the slab or leaving an unsightly, jagged edge.
This article explains the technical requirements, safety precautions, and material-specific challenges you need to navigate before attempting this modification. Understanding these variables will help you determine if you should tackle this as a DIY project or call a professional.
The short answer is yes, you can cut a pre-cut vanity top down from 37 inches to 35 inches, provided you use the correct equipment for the material. Removing two inches is a manageable amount for most stone or composite surfaces, but the process changes significantly depending on whether you are working with cultured marble, natural stone, or solid surface materials. You must ensure that the vanity cabinet underneath can still support the shortened top once the overhang is adjusted.
If your vanity top is a standard cultured marble or solid surface piece, you can typically use a standard circular saw equipped with a diamond-tipped masonry blade. If you are dealing with heavy natural stone like granite or quartz, you risk fracturing the material unless you have a high-end wet saw and significant experience. Never attempt to cut these materials with a standard wood-cutting blade, as the blade will dull instantly and likely cause the vanity top to shatter.
Assessing Your Vanity Top Material

Before you make your first cut, you need to identify the exact composition of your countertop. Different materials react differently to vibration, heat, and pressure during the cutting process. Cultured marble, for instance, is a resin-based product that is relatively easy to trim but prone to chipping if the feed rate is too fast.
Natural stone, such as granite or marble, is much denser and requires a cooling agent to prevent the material from cracking due to friction heat. Engineered stone or quartz is incredibly hard and often contains resins that can melt or discolor if the blade speed is not managed correctly. If your vanity top is made of a laminate or thin synthetic material, a circular saw might be too aggressive, potentially tearing the surface layer.
Essential Tools for the Job
To perform a successful cut, you need more than just a saw. You will need a high-quality diamond blade designed specifically for the material you are cutting. A wet-cutting saw is ideal because it keeps the blade cool and minimizes the hazardous silica dust that becomes airborne when cutting stone or quartz.
If you don’t own a professional-grade wet saw, you can rent one from a local hardware store for a daily fee. You will also need a straight edge or a guide rail to ensure your cut is perfectly square and straight. Because you are removing two inches, you should also have a set of clamps to secure the vanity top to your workbench to prevent any movement while the blade is running.
Safety Considerations and Dust Management

Cutting bathroom vanity materials creates a significant amount of dust, some of which may contain silica. You must wear an N95-rated respirator or a P100 mask to protect your lungs from fine particles. Eye protection is non-negotiable; safety glasses or a full face shield will protect you from flying stone chips that can travel at high speeds.
Work in a well-ventilated area, preferably outdoors, to keep your workspace clear of dust accumulation. If you are cutting indoors, you must seal off the room and use a HEPA-filtered vacuum attached to the saw’s dust port. Remember that water and electricity are a dangerous combination, so ensure your power cords are kept away from the water spray of a wet saw.
Measuring and Marking the Cut
Precision is the most important part of this process because you cannot add material back once it has been removed. Measure the desired 35-inch length from the finished edge of the vanity top, not the rough edge. Use a carpenter’s square to draw a perfectly perpendicular line across the surface where you intend to cut.
Apply masking tape over the line you have drawn to help prevent the surface material from chipping as the blade enters and exits the cut. Double-check your measurements against the dimensions of your bathroom alcove or cabinet. Remember that you may need to account for wall irregularities, so it is often safer to cut slightly proud of your mark and sand the edge down to a perfect fit later.
Handling the Finished Edge

After you have successfully cut the vanity top down to 35 inches, the edge will be raw and unfinished. If the vanity top is installed against a wall, the raw edge might be hidden by the backsplash or the wall itself. However, if the cut side is exposed, you will need to polish it to match the factory-finished edges.
You can use a series of diamond polishing pads, starting with a coarse grit and moving to a fine grit, to smooth the cut surface. This process requires a handheld variable-speed polisher and a steady hand. Many DIYers find that the raw edge looks acceptable if it is tucked against a side wall and covered with a bead of silicone caulk, eliminating the need for extensive polishing.
Common Risks and Potential Pitfalls
The biggest risk when trimming a vanity top is the possibility of the material snapping along a weak point, such as the sink cutout. If your 37-inch top has a centered sink, removing two inches from one side will shift the sink’s position relative to the center of the cabinet. You must ensure that the new 35-inch length still leaves enough material to support the sink basin securely.
Another risk is the “blowout” that occurs when the saw blade exits the material at the end of the cut. To avoid this, you can clamp a sacrificial piece of wood to the underside of the vanity top where the blade will exit. This creates a bridge that supports the material and prevents the stone from breaking away prematurely.
Comparing Modification Methods
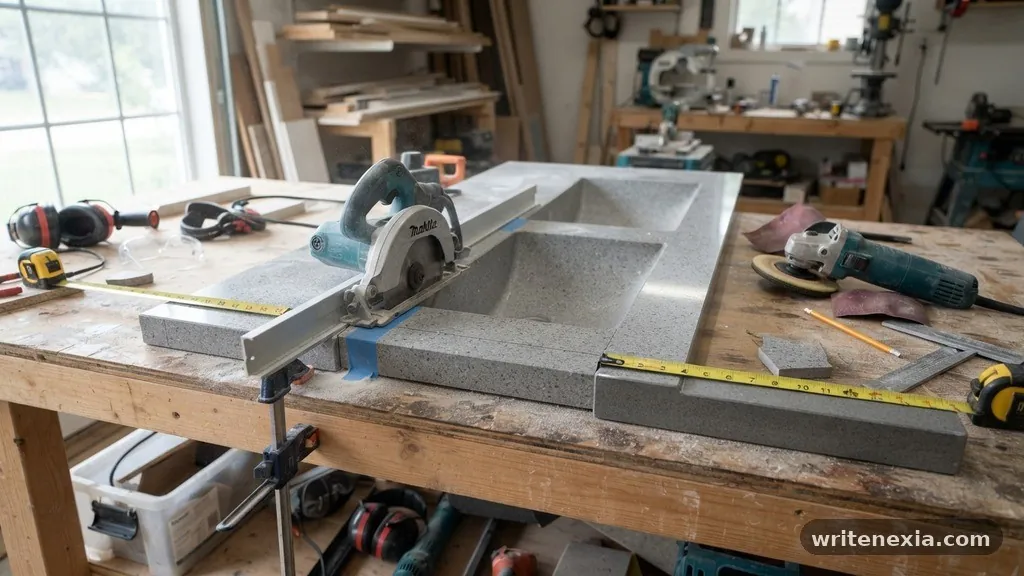
Depending on your comfort level with power tools, you have several options for achieving your target length.
| Method | Equipment Needed | Risk Level | Finish Quality |
|---|---|---|---|
| Wet Saw (Rental) | Diamond blade, water pump | Low | High |
| Circular Saw (Dry) | Diamond blade, guide | High | Moderate |
| Hand Grinder | Diamond cup wheel | Moderate | High (Requires skill) |
Professional vs. DIY Approaches
If you are not confident in your ability to make a clean, straight cut, hiring a professional stone fabricator is the safest path. Fabricators have specialized machinery that can cut through thick slabs in a single pass without the risk of cracking. They can also provide a professional bullnose or eased edge finish that is difficult to replicate by hand.
However, hiring a professional can be expensive, sometimes costing as much as buying a new 35-inch vanity top. If you choose to do it yourself, start by practicing on a scrap piece of similar material. This will give you a feel for how the blade reacts and help you adjust your speed to achieve a clean cut.
Frequently Asked Questions
Is it possible to cut a vanity top without removing the sink?
It is technically possible if the sink is an undermount, but it is highly inadvisable. The vibration from the saw can cause the sink to detach or the seal to break. It is best to remove the vanity top entirely from the cabinet before making any cuts.
Will cutting the vanity top void the warranty?
Yes, almost all manufacturers will void their warranty the moment you cut or modify the vanity top. Be aware that if you crack the slab during your attempt, you will not be able to return it or claim a refund.
Can I cut a 37-inch top to 35 inches if it has a backsplash?
You will need to cut the backsplash as well. Make sure you measure the backsplash to the same length as the vanity top. If the backsplash is attached to the wall, you may need to remove it carefully before cutting the top.
What is the most common mistake when cutting vanity tops?
The most common error is failing to secure the vanity top properly. Any movement or vibration during the cutting process will lead to uneven edges or catastrophic cracks across the surface.
Can I use a jigsaw for this project?
A jigsaw is generally not recommended for cutting stone or solid surface vanity tops. The blade flexes too much, leading to inaccurate cuts and a high chance of breaking the material.
Conclusion
Successfully modifying a vanity top requires careful planning and the right set of tools. While you can cut a pre-cut vanity top down from 37 inches to 35 inches, you must be prepared for the dust, the noise, and the risk of damaging the material. Always verify that your cabinet can handle the modified size and that the sink cutout remains structurally sound.
By taking your time with measurements and using a proper wet saw, you can achieve a professional-looking result that fits your space perfectly. If the process feels beyond your current skill level, don’t hesitate to consult a local fabricator who can handle the job with precision. Taking these steps ensures your bathroom renovation remains on track and within your budget.
Leave a Reply
Discovering water pooling around the faucet base on your new vanity top is a frustrating experience that often signals a simple installation oversight or a minor component failure. While a brand-new fixture should theoretically be watertight, small gaps in the mounting seal or loose connections can lead to moisture accumulation that threatens your countertop finish.
Understanding why this happens allows you to address the issue before it causes permanent water damage to your cabinetry or vanity material. This article explores the common mechanical culprits behind these leaks and provides practical, step-by-step solutions to ensure your bathroom faucet remains dry and functional for years to come.
Immediate Causes of Leaks at the Faucet Base
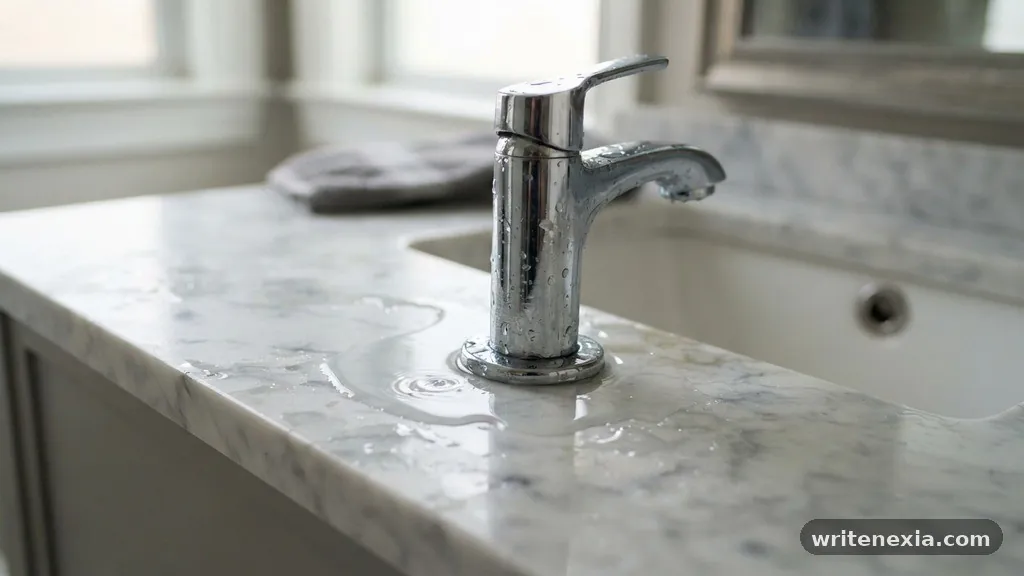
The most frequent reason for water pooling around the faucet base on your new vanity top is a compromised gasket or an improperly tightened mounting nut. When a faucet is installed, a rubber or plastic gasket is intended to sit between the metal base and the countertop surface.
If this gasket is misaligned or pinched during installation, it creates a direct channel for water to seep through the hole. Even a tiny misalignment can allow capillary action to draw water from the deck onto the vanity surface.
Another common culprit is the failure to use plumber’s putty or silicone sealant where the manufacturer requires it. Some modern faucets rely strictly on integrated rubber gaskets, but many still necessitate a bead of waterproof silicone to bridge gaps in uneven stone or laminate counters.
If the installer skipped this step, water splashing near the handle or spout can easily find its way underneath the base. Once water is trapped under the decorative plate, it often sits there until it eventually migrates outward, creating the appearance of a persistent leak.
Loose mounting hardware is also a major factor that homeowners often overlook. Over time, or due to insufficient tightening during the initial build, the nuts holding the faucet to the vanity can back off slightly.
This vibration and lack of tension break the seal between the gasket and the sink deck. If you can wiggle the faucet base even slightly with your hand, the mounting hardware is almost certainly loose and requires immediate adjustment to stop the water ingress.
Checking the Internal Cartridge and O-Rings
If the mounting hardware is tight and the gasket is properly seated, the leak may originate from the internal components of the faucet itself. A faulty cartridge or worn-out o-rings often cause water to leak internally and drip down the faucet shank into the cabinet or onto the top.
This is particularly common in high-end units where a manufacturing defect in the cartridge seal might not show up until the faucet has been under pressure for a few days. If you notice water around the handle area, it is a strong indicator that the internal seal is the primary failure point.
When the internal cartridge fails, water may bypass the valve seat and travel down the stem of the faucet body. Because the faucet body is hollow, this water eventually exits at the bottom where the assembly meets the countertop.
To determine if this is the cause, dry the area completely and wrap a paper towel around the base of the handle. If the paper towel becomes wet while the faucet is turned on, the leak is internal and you likely need to replace the cartridge rather than resealing the base.
O-rings located within the faucet body also serve as critical barriers against water migration. These rubber loops degrade over time, but on a brand-new vanity setup, they might be defective or improperly lubricated from the factory.
If you have a Moen or similar brand, these parts are often modular and designed for easy servicing. Replacing a faulty cartridge or set of o-rings is usually a straightforward task that doesn’t require professional plumbing services, provided you have the correct manufacturer-specific parts.
Comparing Potential Leak Sources
Identifying the specific source of water pooling requires a systematic approach to elimination. The following table outlines how different symptoms point to specific mechanical failures, helping you narrow down the repair process.
| Symptom | Likely Cause | Recommended Action |
|---|---|---|
| Water appears only when the handle is moved | Handle O-ring or cartridge failure | Replace the internal cartridge |
| Water pools after washing hands | Inadequate base gasket seal | Apply silicone sealant under base |
| Faucet base wiggles slightly | Loose mounting nut | Tighten hardware underneath |
| Constant drip from the spout | Damaged aerator or valve seat | Clean aerator or replace valve |
The Role of the Aerator and Spout
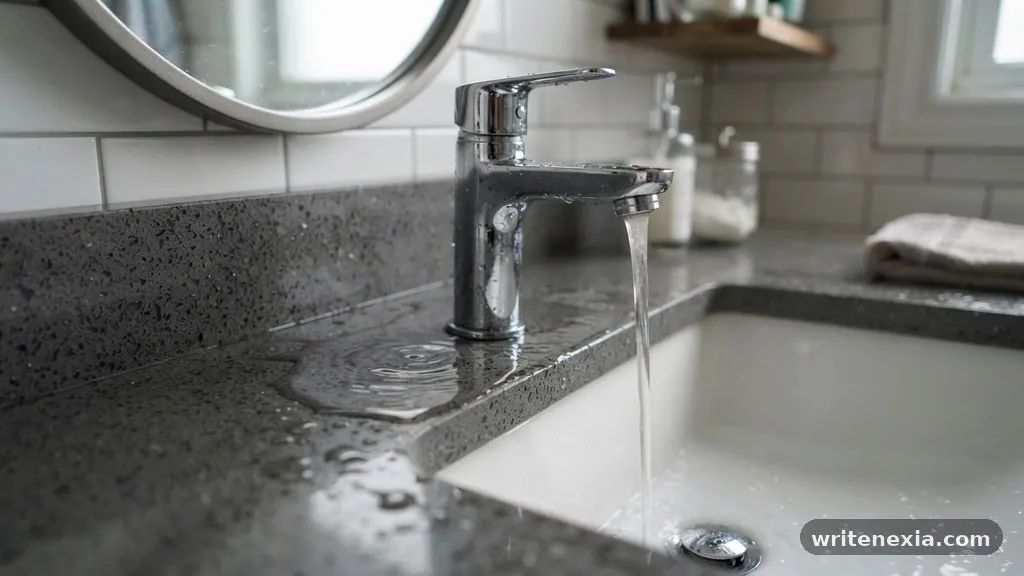
Sometimes, the water isn’t actually leaking from the base at all, but rather being directed there by a malfunctioning aerator. If the aerator is clogged with debris from the new plumbing lines, it can cause the water stream to spray or flow unevenly.
This erratic flow often hits the edge of the sink or the handles, splashing water onto the countertop. When this happens, it looks exactly like a base leak because the water naturally flows toward the lowest point, which is the intersection of the faucet and the vanity top.
Checking the aerator is the simplest diagnostic step you can take. Unscrew the aerator from the end of the spout and inspect it for mineral buildup or construction debris. If you find debris, flush the faucet without the aerator attached for a few seconds to clear the lines.
After cleaning or replacing the aerator, observe the water flow to see if the erratic splashing stops. This simple maintenance task solves a surprising number of “leak” complaints that are actually just issues with water trajectory.
Addressing Loose Mounting Hardware
If you determine that the mounting hardware is the problem, you will need to access the underside of your vanity. This often involves clearing out storage space and using a basin wrench to reach the nuts securing the faucet shanks.
Ensure the faucet is perfectly centered before tightening the nuts, as any tilt can prevent the gasket from creating a uniform seal. Do not overtighten the nuts, as this can crack delicate stone or porcelain countertops, which would be a much costlier repair than a simple leak.
Once the nuts are snug, check the stability of the faucet from above. If the base remains firm and does not move under light pressure, the seal should be restored. If you still see water pooling, consider applying a thin, clear bead of bathroom-grade silicone around the perimeter of the base.
This acts as a secondary defense, preventing any surface water from finding its way into the mounting hole. Ensure the surface is completely dry and free of any dust before applying the silicone to guarantee proper adhesion.
When to Replace the Faucet
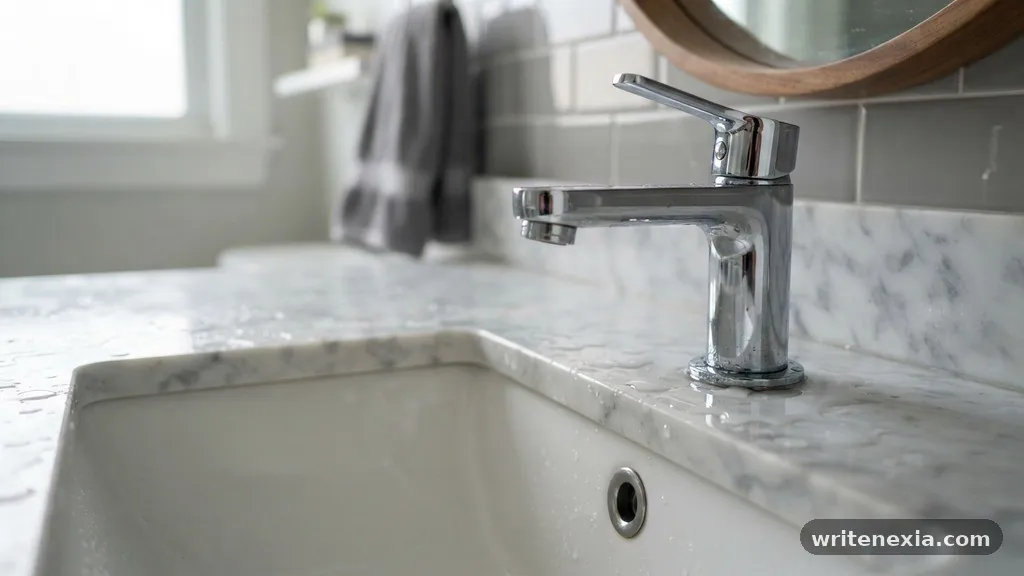
In some cases, the issue may stem from a manufacturing defect in the faucet casting itself. If you have tightened the hardware, replaced the cartridges, and applied sealant, yet water continues to appear, there may be a hairline fracture in the faucet body. This is rare, but it does occur in low-quality or damaged units.
If the faucet was purchased very recently, check the warranty information provided by the manufacturer. Most major brands offer replacements for units that fail within the first year of operation.
Before deciding to replace the entire fixture, document the issue with photographs and notes on your troubleshooting steps. This documentation is invaluable if you need to request a warranty claim or return the product to the store.
Replacing a faucet is a significant task, so ensure you have exhausted all other repair options before committing to a full replacement. If you do choose to replace it, look for models with solid brass construction to minimize the risk of future structural leaks.
Common Mistakes During Installation
Many homeowners inadvertently cause leaks by failing to follow the manufacturer’s installation manual exactly. Every faucet has specific requirements for the size of the mounting hole and the thickness of the deck.
If the hole is too large, the base plate may not cover the gap entirely, leaving a path for water. Furthermore, failing to use the provided rubber washers or spacers on the underside of the vanity is a common oversight that leaves the faucet unstable.
Another frequent error is the improper use of Teflon tape. While Teflon tape is essential for threaded pipe connections inside the wall, it should never be used on the connection between the faucet and the supply lines if they utilize rubber gaskets.
Over-applying tape can prevent the gasket from seating properly, leading to a slow drip at the connection point that eventually migrates to the vanity top. Stick to the manufacturer’s guidelines regarding thread sealant to ensure every joint is watertight.
Preventing Future Water Damage
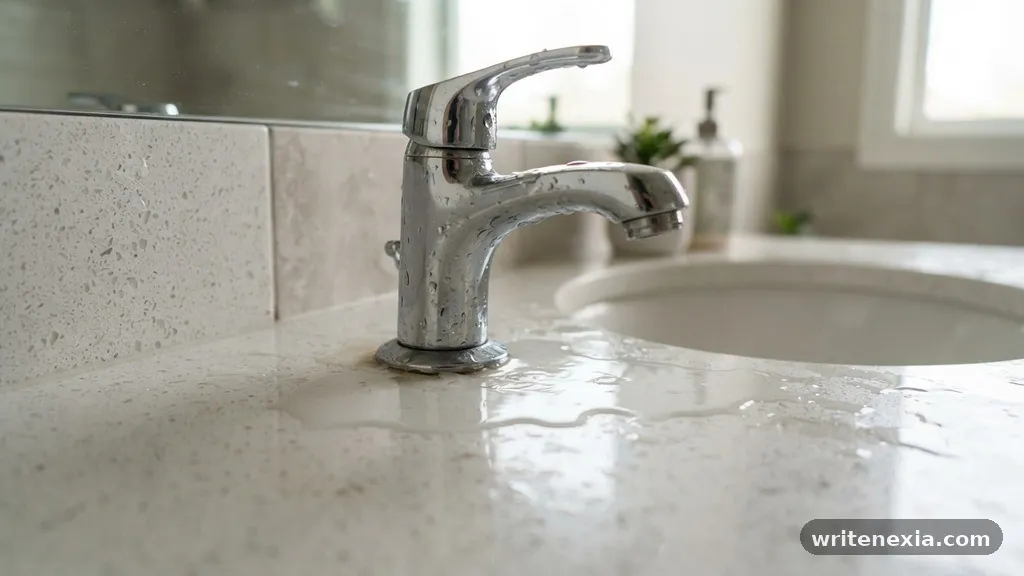
Protecting your vanity top from water damage goes beyond fixing the faucet. Even a perfectly installed faucet can splash, and leaving standing water on a wood or stone vanity will eventually degrade the finish.
Always keep a small cloth nearby to wipe down the area around the faucet after use. This simple habit prevents moisture from sitting on the surface and finding its way into the seams of your vanity.
Consider applying a high-quality sealant to your stone or wood vanity top once or twice a year. This creates a hydrophobic barrier that causes water to bead up rather than soaking into the material.
If you have a marble or granite top, a professional-grade sealer will protect the stone from etching and staining caused by soap or hard water. Maintaining the vanity surface is just as important as maintaining the hardware attached to it.
Tools Required for Troubleshooting
Having the right tools on hand makes the job of diagnosing a leak much easier and safer for your fixtures. You do not need a professional-grade workshop to handle these repairs.
Most tasks can be completed with a standard toolkit that you likely already own. Here is a list of essential items to keep in your home for plumbing maintenance:
- Adjustable wrench for tightening nuts and supply lines.
- Basin wrench for accessing hard-to-reach mounting hardware under the sink.
- Silicone sealant for creating a waterproof barrier at the base.
- Flashlight or headlamp to see clearly inside the dark cabinet space.
- Paper towels to test for leaks and keep the workspace dry.
- Replacement cartridges or o-rings specific to your faucet brand.
Frequently Asked Questions
Why does my new faucet leak only when I turn it on?
If the leak only occurs while the water is running, it is likely an issue with the internal cartridge or a loose connection on the supply line. Check the cartridge for a faulty seal, as this is the most common cause of pressure-related leaks.
Can I use silicone on every faucet base?
While silicone is excellent for sealing gaps, check your faucet’s manual first. Some high-end fixtures are designed to drain water internally, and sealing them with silicone can trap water inside the body, causing premature corrosion.
How do I know if my faucet mounting nut is loose?
Place your hand on the faucet base and try to gently rotate it. If the entire unit moves or rocks, the mounting nut under the sink has likely loosened and needs to be tightened with a basin wrench.
Is it normal for a little water to stay under the base plate?
No, it is not normal. A properly installed faucet should have a watertight seal that prevents any water from getting under the base plate. Any water found there indicates that the seal is compromised.
What should I do if the leak is coming from inside the wall?
If the leak is originating from the supply lines behind the wall or in the floor of the vanity, shut off the water supply valves immediately. This type of leak requires professional attention to prevent significant structural damage to your home.
Conclusion
Dealing with water pooling around the faucet base on your new vanity top is a common annoyance, but it is usually manageable with a bit of patience and the right diagnostic approach. By checking your mounting hardware, verifying the integrity of the internal cartridge, and ensuring the base seal is watertight, you can stop the moisture from damaging your investment. Remember that the smallest gaps often lead to the biggest problems, so addressing these leaks early is the best way to preserve your bathroom’s appearance.
If you follow the steps outlined, you will likely find that your faucet is back to functioning perfectly without any persistent drips or puddles. Should the issue persist despite your best efforts, do not hesitate to contact a professional plumber to prevent long-term structural harm.
2 thoughts on “Why Is Water Pooling Around the Faucet Base on Your New Vanity Top?”
-
[url=https://karkasnye-doma-spb11.ru]строительство каркасных домов в санкт-петербурге[/url] станет комфортным и энергоэффективным решением для загородной жизни.
Каркасную конструкцию можно собрать быстрее, чем капитальный дом из традиционных материалов.Каркасные стены отличаются хорошими показателями энергоэффективности.
Такая технология позволяет создавать проекты с разным расположением комнат.
Каркасные детали из древесины необходимо просушить и защитить от влаги, грибка и вредителей.
-
NATREGTEGH421202NEWETREWT says:
METYUTYJ421202MARETRYTR

Leave a Reply
Choosing the best Heavy-Duty Steel Brackets for Supporting Granite Vanity Tops is a critical decision that prevents cracking and ensures your bathroom remains safe for years. Because granite is exceptionally heavy and prone to snapping under its own weight if left unsupported, installing the right hardware is essential for any successful renovation.
By prioritizing structural integrity and correct placement, you can avoid costly repairs while achieving a sleek, professional look. This article provides the technical details you need to select, space, and mount high-quality steel supports that keep your stone surfaces stable and level.
Weight Load Requirements
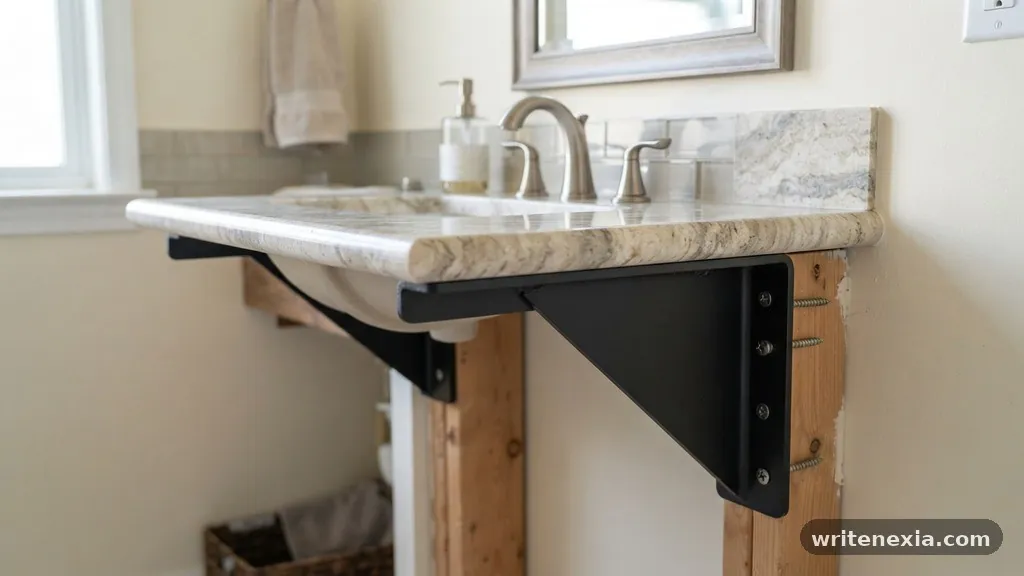
The primary purpose of selecting the best Heavy-Duty Steel Brackets for Supporting Granite Vanity Tops is to manage the immense weight of the stone. A standard 3cm thick slab of granite typically weighs between 18 and 20 pounds per square foot. If your vanity features an extended overhang or a floating design, the stress on the edge of the cabinetry or the wall studs increases exponentially. You must ensure your hardware is rated for these specific loads to prevent bowing or catastrophic failure.
Most professional-grade steel brackets are fabricated from 1/4-inch or 3/8-inch thick hot-rolled steel. These materials provide the necessary rigidity to handle the leverage applied by heavy stone slabs.
Avoid lightweight aluminum or thin gauge sheet metal, as these materials often flex under sustained pressure. A true heavy-duty bracket remains rigid, ensuring the stone does not develop hairline fractures over time.
Hidden Versus Decorative Designs
Homeowners often choose between hidden steel brackets and decorative corbels, but the structural requirements remain the same. Hidden brackets are designed to be recessed into the wall studs or cabinet frame, creating a floating effect where the granite appears unsupported. These are ideal for modern bathrooms where clean lines and a minimalist aesthetic are the primary goals. Because they lack the physical mass of a corbel, they rely entirely on the tensile strength of the steel and the quality of the mounting hardware.
Decorative corbels, conversely, provide a visual sense of support while also acting as a physical brace. These are often made from cast iron, solid wood, or steel with ornate finishes.
While they are aesthetically pleasing, you must still ensure the core material is load-bearing. A purely decorative corbel that is glued to the drywall without being anchored into a stud will not protect your granite from cracking.
Material Thickness and Steel Quality
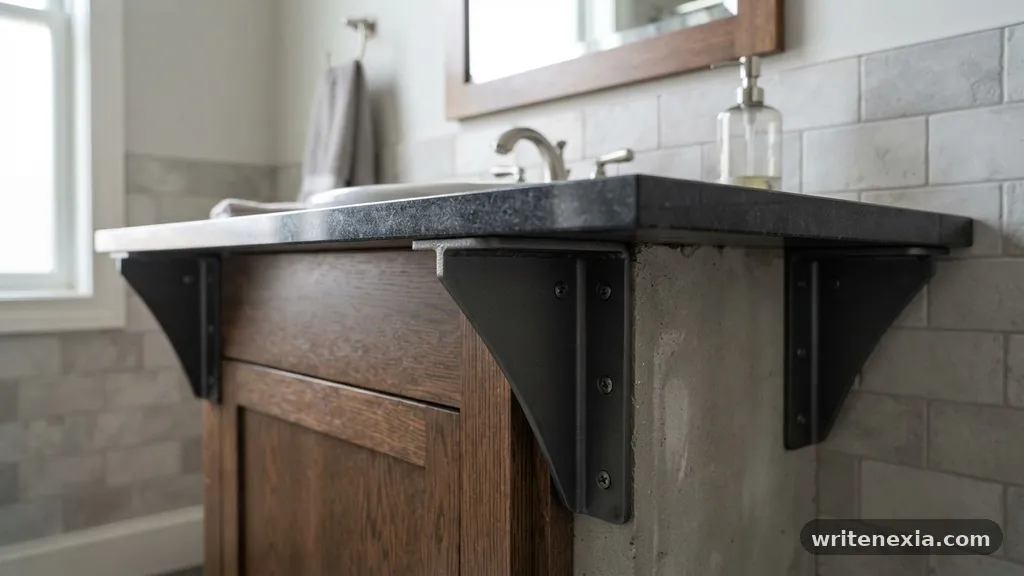
When you evaluate the best Heavy-Duty Steel Brackets for Supporting Granite Vanity Tops, the quality of the steel is just as important as the design. Look for brackets made from 1018 cold-rolled steel or similar high-carbon steel alloys. These materials are specifically chosen for their high yield strength, meaning they can support significant weight without permanently deforming. Cheap, low-grade steel may bend over time, leading to a slight sag that ruins the level surface of your vanity.
The thickness of the metal is the most reliable indicator of performance. A 1/4-inch thick bracket is usually the minimum requirement for a standard vanity depth of 22 to 24 inches.
If your granite has a large overhang exceeding 10 inches, you should upgrade to 3/8-inch or even 1/2-inch thick steel. These dimensions offer enough resistance to keep the stone perfectly flat, even if someone leans heavily against the edge of the vanity.
Correct Spacing and Layout
Proper spacing is the most overlooked factor in granite support, yet it is just as vital as the bracket quality itself. You should generally space your supports no more than 24 to 30 inches apart along the length of the vanity. If you have a long vanity, you must calculate the number of brackets based on the total span of the granite. Placing supports too far apart allows the stone to flex between the connection points, which is the most common cause of stress fractures.
You must also align your brackets with the structural members of your home, such as wall studs or custom support blocking inside the vanity cabinet. Installing a bracket into drywall alone will result in the fastener pulling out under the weight of the stone. Always use heavy-duty lag bolts or structural screws that penetrate at least 2 to 3 inches into the wooden framing behind the wall.
Installation Techniques for Stability
The installation process begins with ensuring your mounting surface is perfectly level before the granite is even placed. If the wall or the cabinet frame is uneven, the granite will sit at an angle, creating uneven pressure points on the steel brackets. Use shims to adjust the height of individual brackets until they form a perfectly level plane across the entire width of the vanity. This step is tedious but necessary to ensure the stone sits flush against every support point.
Once the brackets are level, you must secure them using the correct fasteners. Standard wood screws are rarely strong enough to handle the sheer force of a granite slab.
Use structural lag screws with a large diameter to ensure they bite deeply into the studs. If you are mounting into concrete or masonry walls, use high-quality wedge anchors or sleeve anchors to prevent the bracket from shifting.
Comparing Support Options
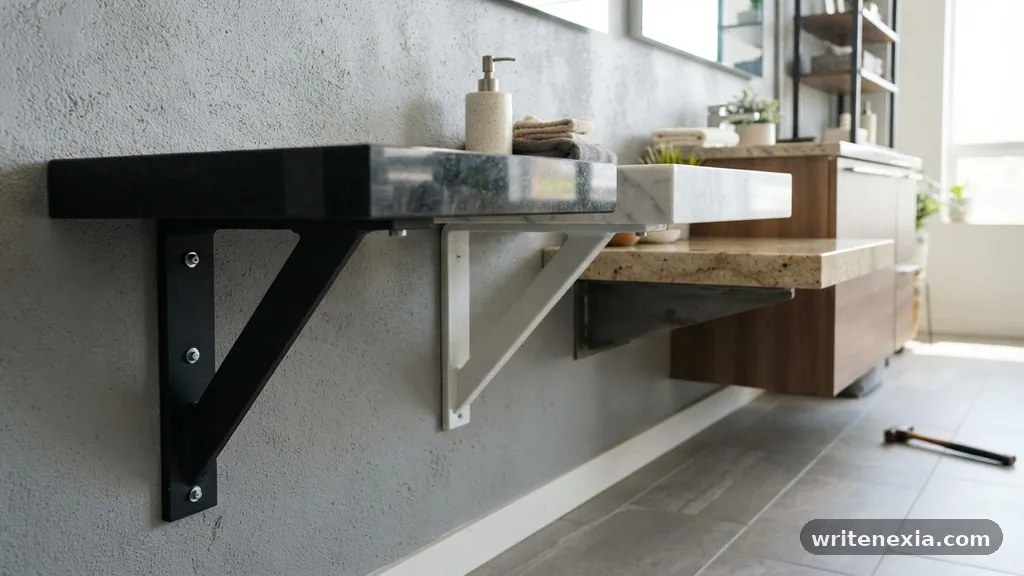
| Support Type | Material | Best Use Case | Load Capacity |
|---|---|---|---|
| Hidden Steel Plate | 1/4″ Steel | Modern floating vanities | High |
| Decorative Corbel | Cast Iron | Traditional or rustic styles | Moderate |
| L-Bracket | 3/8″ Steel | Heavy-duty wall mounting | Very High |
| Cabinet-Mounted Brace | Steel/Wood | Standard vanity tops | Moderate |
Adhesives and Finishing Touches
While steel brackets provide the structural foundation, adhesives play a role in keeping the granite from sliding or shifting. A small bead of high-quality silicone adhesive on the top surface of each bracket creates a bond between the metal and the stone. This prevents the granite from vibrating or moving slightly when items are placed on the surface. Do not use rigid epoxy to glue the stone to the brackets, as the stone needs to expand and contract slightly with temperature changes.
If your brackets are visible, such as in a floating vanity design, consider the finish of the steel. Powder coating is the industry standard for durability, as it resists moisture and prevents rust in bathroom environments.
Black or grey powder-coated finishes typically blend well with modern stone colors. If your brackets are hidden, you can choose raw or primed steel, provided you apply a rust-resistant paint to prevent oxidation over time.
Common Mistakes to Avoid
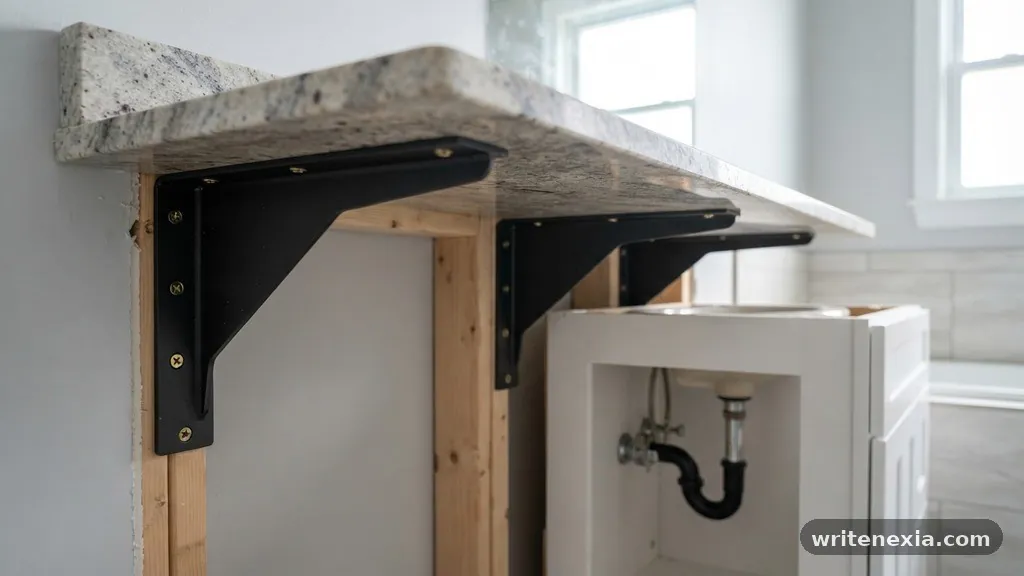
One of the most frequent errors is assuming that the vanity cabinet itself is strong enough to support an extended granite overhang. Most standard vanity cabinets are constructed from thin plywood or particle board that cannot support the weight of granite without reinforcement. If you plan to have a significant overhang, you must install internal steel plates that tie into the wall studs. Relying on the cabinet to hold the weight will eventually lead to the cabinet sides bowing or the granite cracking at the weakest point.
Another mistake is failing to account for the thickness of the granite when calculating the bracket length. A 22-inch deep vanity top requires a bracket that extends almost to the edge of the stone for maximum support.
If your bracket is too short, the outer edge of the granite remains unsupported, creating a fulcrum point that puts immense pressure on the inside edge. Always choose a bracket length that provides support within 2 to 4 inches of the front edge of the stone.
Working with Professional Fabricators
When ordering custom granite, consult with your stone fabricator about your support plan before the vanity top is cut. They have seen countless installations and can advise you on whether your chosen bracket layout is sufficient for the specific type of granite you have selected. Some granite varieties are more brittle than others, and a fabricator may recommend additional support for stone with large natural fissures. They can also help you determine the exact placement for the brackets to ensure they don’t interfere with plumbing or drawers.
If you are buying brackets online, verify the load ratings provided by the manufacturer. Reputable companies will provide technical specifications detailing the weight capacity per pair of brackets.
Do not purchase generic hardware from big-box stores that lacks specific weight ratings. When in doubt, it is always safer to over-engineer your support system by adding an extra bracket rather than risking the integrity of expensive stone.
Maintenance and Long-Term Care
Once installed, check your supports periodically to ensure the fasteners remain tight. Over time, the natural expansion and contraction of the home’s framing can cause screws to loosen slightly. A quick annual inspection allows you to tighten any bolts that have backed out, keeping the entire assembly rigid. If you notice any rust or degradation on the brackets, clean the affected area and apply a touch-up paint to maintain the seal.
Keep an eye on the seam between the stone and the wall or bracket. If you notice the silicone bead pulling away or widening, it may indicate that the vanity is shifting or that a support point has failed.
Addressing these small signs early prevents the granite from developing larger cracks that are impossible to repair invisibly. A well-installed support system should last as long as the granite itself, provided it remains properly secured and protected from moisture.
Frequently Asked Questions
Do granite vanity tops always need support brackets?
Yes, if the granite overhangs the vanity cabinet by more than 6 inches, it requires mechanical support. Granite is a natural stone that is incredibly heavy but brittle, meaning it can snap easily if the unsupported span is too long. While some small vanities seem stable, using heavy-duty steel brackets is the only way to guarantee the stone won’t crack under weight.
How much weight can a single steel support bracket hold?
The weight capacity depends entirely on the thickness of the steel and the mounting method. A high-quality 1/4-inch thick steel bracket properly anchored into a wood stud can typically support between 100 and 200 pounds of distributed weight. Always check the manufacturer’s specific load ratings, as these can vary significantly based on the length and design of the bracket.
Can I mount these brackets directly into drywall?
Never mount support brackets into drywall alone. Drywall lacks the density to hold the heavy-duty fasteners required for granite, and it will fail under the weight of the stone. You must locate the wall studs and use structural lag screws to mount the brackets directly into the house framing for a safe installation.
What is the ideal spacing between brackets?
For most granite vanity tops, you should space your supports between 24 and 30 inches apart. If your vanity is longer, add more brackets to maintain this interval, ensuring no section of the granite is left unsupported for too long. Always align these with the structural studs or internal blocking to ensure the weight is distributed properly.
Is it necessary to use adhesive with the brackets?
Using a small amount of silicone adhesive between the bracket and the granite is recommended. It creates a secure bond that prevents the granite from sliding or vibrating during daily use. However, you should avoid using rigid epoxies or heavy-duty construction adhesives that could prevent the stone from shifting naturally with house temperature changes.
Selecting the Right Hardware for Your Project
Selecting the best Heavy-Duty Steel Brackets for Supporting Granite Vanity Tops is the most effective way to protect your investment and ensure a high-quality finished result. By focusing on steel thickness, proper stud-based installation, and correct spacing, you create a foundation that will support your stone for decades. Never cut corners on the hardware, as the cost of replacing a cracked slab far exceeds the price of premium steel supports. Whether you are aiming for a floating, minimalist look or a classic aesthetic, there is a steel bracket design that fits your needs while providing the structural strength required. Start your project by identifying the load requirements of your specific granite slab, then choose brackets that exceed those specifications to give yourself peace of mind. If you need further assistance with your layout, reach out to your local granite fabricator to confirm your installation plan before you begin the work.
Leave a Reply
Dealing with a bathroom remodel often reveals hidden issues, and leveling a pre-fab vanity when the tile floor has a 1/2 inch slope is a common challenge for homeowners. A vanity that sits unevenly will not only look wrong but can also cause your countertop to crack and your cabinet doors to bind. Addressing this gap requires a methodical approach involving precise measurements, shimming, and securing the unit to the wall studs.
By properly accounting for the floor’s pitch, you ensure your vanity remains stable and functional for years. This process provides the structural integrity needed to protect your plumbing connections and your vanity finish from unnecessary stress.
The Immediate Fix: Using Shims for Stability
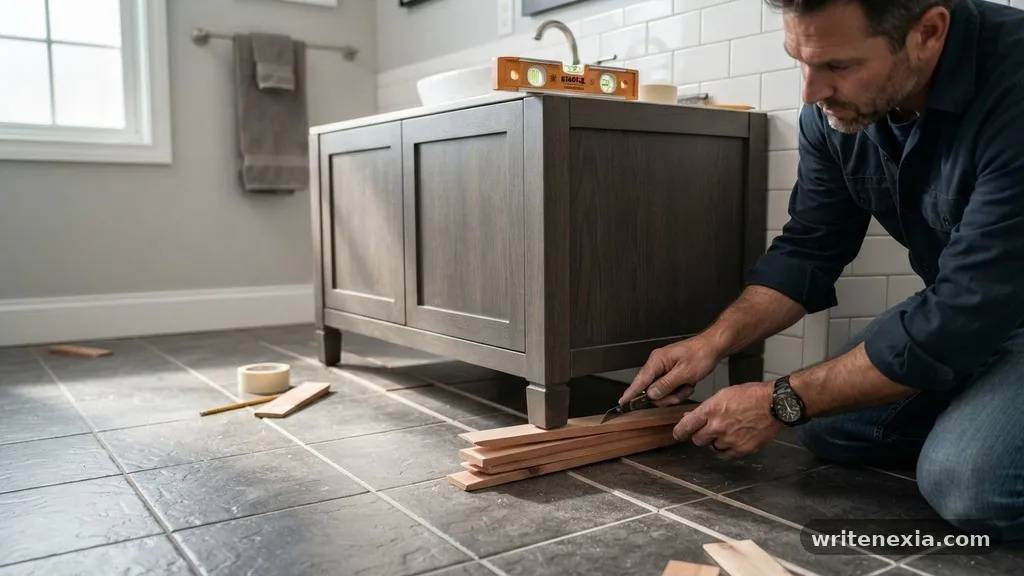
When you encounter a 1/2 inch slope, your primary tool for correction is the humble shim. You should start by placing a spirit level or laser level across the top of the vanity to determine exactly where the high and low points are. Because your floor drops by a half-inch, the side of the cabinet sitting on the lowest point will require a stack of shims to reach the level plane of the high side.
Avoid using makeshift items like cardboard or folded paper, as these compress over time and lose their structural integrity. Instead, opt for composite shims rather than traditional cedar shims in a bathroom setting.
Composite materials are impervious to the moisture that frequently accumulates around a bathroom floor. They will not rot, swell, or shrink when exposed to the humidity generated by your shower or sink.
Measuring and Marking the Slope
Before you commit to a permanent installation, you must accurately gauge the slope across the entire footprint of the vanity. Place your cabinet in its intended location and use a long level to check both the front-to-back and side-to-side orientation. If the floor is consistently sloping in one direction, mark the floor at the base of the cabinet where the gap is largest.
Use a scribe tool or a carpenter’s pencil to mark the cabinet base if you need to trim the bottom edge. However, for a 1/2 inch gap, shimming is usually the cleaner and more reversible option.
Ensure that you are measuring from the highest point of the tile floor, as this serves as your baseline. If you build up the low side without verifying the high side, you will end up with a cabinet that is level but stands too high for the plumbing rough-in.
Managing Plumbing and Rough-in Height
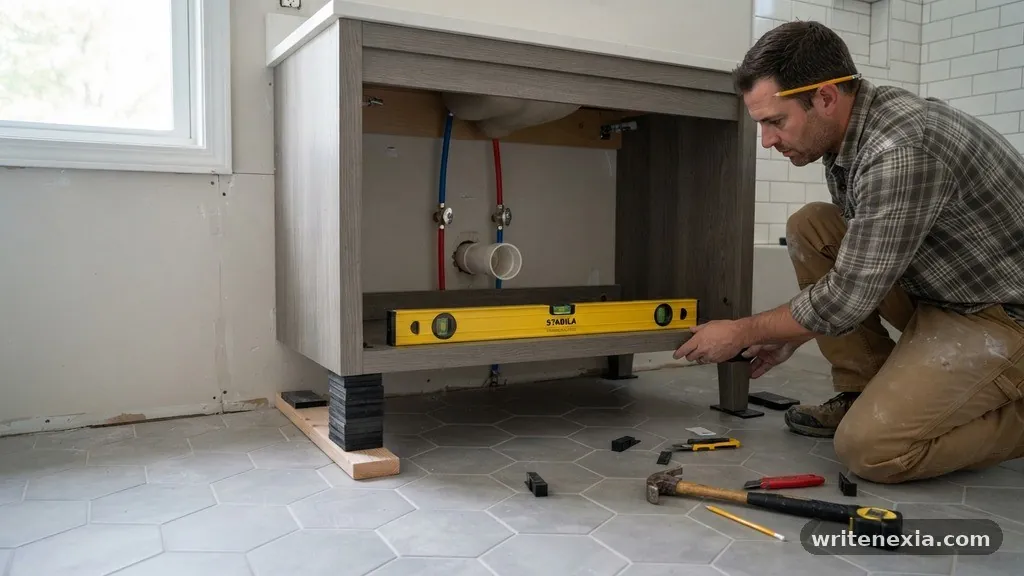
A significant risk when leveling a vanity is the alignment of your water supply lines and the P-trap. When you raise the vanity to accommodate a 1/2 inch slope, you effectively move the entire cabinet upward. This can cause the existing drain pipe in the wall to sit too low, preventing the P-trap from connecting properly.
Always check your shut-off valves before finalizing the vanity position. If the elevation change is significant, you might need to adjust the plumbing lines within the wall or use flexible supply lines to compensate for the shifted height.
If the P-trap alignment is off by more than a quarter-inch, it is safer to hire a plumber to relocate the drain rather than forcing the pipes. Forcing a connection creates tension that can lead to leaks behind your vanity, which often go unnoticed until significant water damage occurs.
Selecting the Right Shims for the Job
Not all shims are created equal, and the type you choose determines how long the leveling job will last. While cedar is easy to cut, it can be crushed by the weight of a heavy vanity top, especially if the cabinet is made of particleboard. Composite shims are denser and offer better load-bearing capacity for marble or granite vanity tops.
Comparison of Common Leveling Materials
| Material | Moisture Resistance | Load Capacity | Ease of Use |
|---|---|---|---|
| Composite Shims | Excellent | High | Moderate |
| Cedar Shims | Low | Medium | High |
| Plastic Wedges | High | Medium | Moderate |
When installing these, drive them in from both the front and the back of the cabinet to ensure even support. If you only shim the front, the back of the vanity may settle over time, causing the vanity top to pull away from the wall. Once the cabinet is level, use a multi-tool or an oscillating saw to trim the protruding ends of the shims flush with the cabinet base.
Securing to Wall Studs
Leveling is only the first step; securing the unit ensures it stays that way. Never rely on the weight of the vanity to hold it in place, especially if you have used significant shimming. Locate your wall studs using a stud finder and mark them clearly on the wall behind the vanity.
Use high-quality cabinet screws to anchor the vanity frame to the studs. If the vanity is a pre-fab model, it likely has a solid mounting rail at the back; if not, you may need to drill through the back panel into the studs.
Always use washers if the screw head is small to prevent it from pulling through the cabinet material. Secure the cabinet at both the top and bottom rails for maximum stability and to prevent any shifting during daily use.
Dealing with the Toe Kick Gap
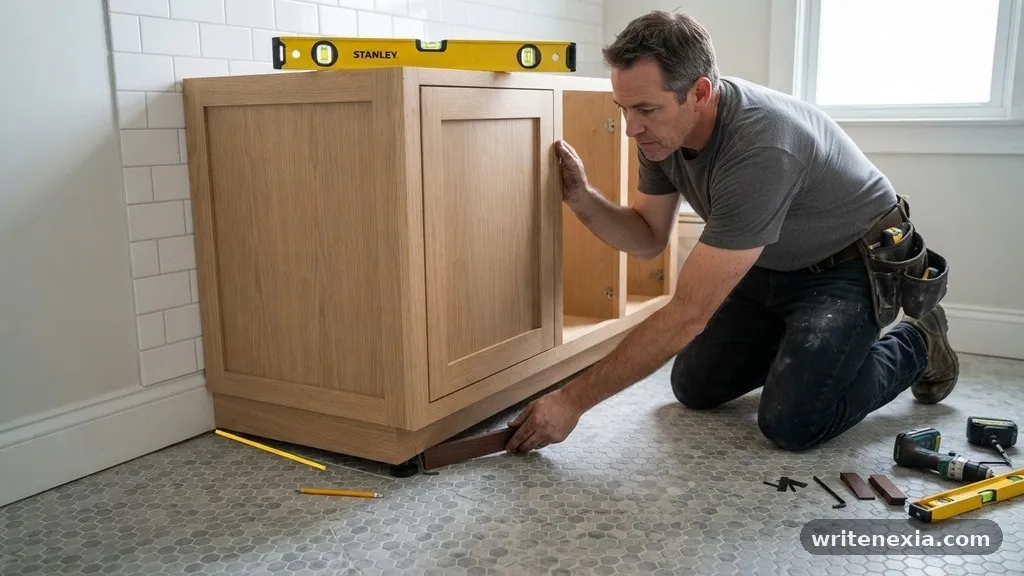
Once your vanity is perfectly level, you will likely notice a visible gap between the bottom of the vanity and the tile floor. This is an aesthetic issue rather than a structural one, but it can look unprofessional if left unaddressed. You can cover this gap by installing a piece of matching toe-kick molding or quarter-round trim.
If the gap is uneven, you may need to scribe the molding to match the contour of your tile. Use a piece of wood as a spacer to trace the floor’s profile onto the back of the molding.
Cut along this line with a coping saw or a jigsaw to ensure a tight, custom fit. Secure the molding with a small amount of construction adhesive or finish nails, but avoid nailing into the vanity base if it contains plumbing lines.
The Importance of a Moisture Barrier
Bathrooms are high-moisture environments, and the base of your vanity is particularly vulnerable to water splashes. When you shim a vanity, you create an open space between the cabinet and the floor that can trap water. To prevent mold and rot, apply a bead of silicone caulk along the front edge of the vanity where it meets the floor.
This sealant acts as a moisture barrier, preventing water from seeping under the cabinet and damaging the subfloor or the shims. Do not seal the back of the vanity against the wall, as you want any accidental leaks to be visible rather than trapped inside the wall cavity. A clean, thin line of silicone around the base provides a finished look and adds a layer of protection against daily cleaning routines.
Checking for Plumb and Square
Leveling is about the horizontal plane, but you must also ensure your vanity is plumb—perfectly vertical. If the vanity is not plumb, your cabinet doors will not hang correctly and may swing open or closed on their own. Use your level vertically against the side panels of the vanity to verify that the unit is not leaning forward or backward.
If the vanity is out of plumb, you may need to adjust your shims or add a secondary set of shims behind the top or bottom of the cabinet. A cabinet that is both level and plumb will ensure the doors operate smoothly and the drawers do not slide out unexpectedly. This attention to detail prevents the “racking” of the cabinet frame, which can cause the finish to crack at the joints over time.
When to Consider a Mortar Bed
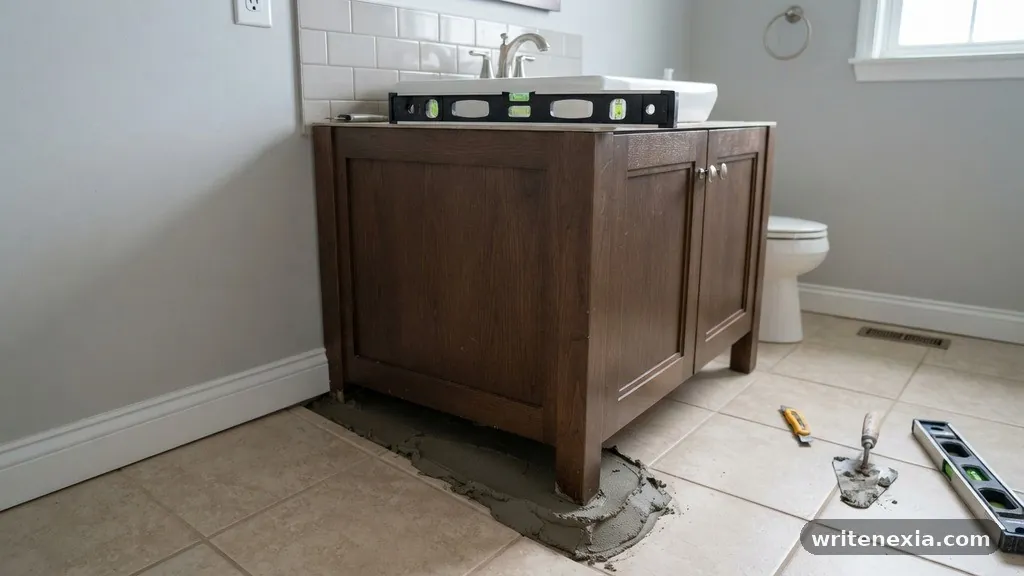
If the slope of your floor is severe—exceeding a full inch—shimming might become unstable or visually unappealing. In these cases, creating a level mortar bed is a more professional approach. You can build a small, level platform using a thin layer of quick-setting mortar or a leveling compound.
After the compound cures, you have a solid, flat surface to place your vanity on. This eliminates the need for extensive shimming and provides the most stable foundation possible for heavy stone countertops.
This method is more labor-intensive and requires waiting for the material to dry, but it is the most reliable way to handle significant floor irregularities. Always ensure the subfloor is clean and primed before applying any leveling compound to ensure proper adhesion.
Common Mistakes to Avoid
Many DIYers make the mistake of assuming the vanity is square out of the box. Always test the vanity frame before you begin, as pre-fab units can sometimes be slightly twisted from shipping. Another common error is failing to check the floor transition between the bathroom and the hallway.
If your vanity is too high, it might block the door swing or create a tripping hazard near the doorway. Always verify the overall height of the vanity top relative to the surrounding fixtures before you lock it in place.
Lastly, avoid using standard wood glue for shims; it is not designed for the high-moisture conditions found in bathrooms. Use construction-grade adhesives or leave the shims mechanical-only so they can be adjusted if the house settles.
FAQ: Troubleshooting Vanity Leveling
Do I really need to use a level for a small vanity?
Yes, even a small vanity requires a level surface. If the vanity is off-level, the weight of the countertop will distribute unevenly, which can lead to stress fractures in the vanity top or cause the cabinet frame to warp over time.
Can I just use grout to fill the gap under the vanity?
You should avoid using grout to fill the gap under a vanity. Grout is brittle and will crack as the floor and cabinet expand and contract with humidity changes. Use a flexible trim piece or silicone caulk instead.
What if my wall studs don’t line up with the vanity?
If the pre-drilled holes in your vanity do not align with your wall studs, do not try to use hollow wall anchors. Instead, drill new holes in the back rail of the vanity that align with the studs. If that is not possible, install a piece of blocking or a mounting cleat to the wall first.
How do I know if the floor is the problem or the vanity?
Use a long level to check the floor across the entire width of the vanity area. If the bubble is centered on the floor but off on the vanity, your vanity frame may be twisted. If the bubble is off on the floor, the substrate is the issue.
Is it okay to leave the vanity unattached if it’s level?
No, you must always secure the vanity to the wall. The weight of the plumbing fixtures and the vanity top can cause the unit to tip forward if it is not properly anchored to the wall studs.
Next Steps for Your Project
Successfully leveling a pre-fab vanity when the tile floor has a 1/2 inch slope is a rewarding project that significantly improves the longevity of your bathroom installation. By prioritizing structural stability with composite shims and ensuring a moisture-resistant finish, you protect your investment from future damage. Always double-check your plumbing connections and wall stud alignment before applying the final bead of silicone caulk.
If you find the slope is too severe for simple shimming, do not hesitate to use a leveling compound to create a solid base. Taking these extra steps ensures your vanity looks professional and remains functional for many years to come. If you have questions about specific product materials or need assistance with your plumbing layout, feel free to reach out for further guidance on your renovation.
One thought on “How to Level a Pre-Fab Vanity When the Tile Floor Has a 1/2 Inch Slope”
-
I have tested dozens of online gaming sites and this one stands out for its genuine transparency. No hidden terms on the promotions and the VIP program actually rewards loyal players. I feel completely at ease managing my bankroll thanks to the secure payment gateway. Sign up and play safely at mxskyhills

Помогаем быстро перейти от консультации к конкретному плану: выезд, стационар или наблюдение.
Ознакомиться с деталями – [url=https://narkologicheskaya-klinika-voronezh20.ru/]наркологическая клиника цены в Воронеже[/url]